Positioning Objects with Snap Functions
- What is Draw?
- Parts of the main Draw window
- Choosing and defining colors
- Positioning objects with Snap functions
- Positioning objects with guiding lines
- The basic drawing shapes
- Drawing geometric shapes
- Selecting objects
- Moving and dynamically adjusting an object’s size
- Editing objects
- Using styles
- Special effects
- Combining multiple objects
- Aids for positioning objects
- Inserting and editing pictures
- Working with 3D objects
- Exporting graphics
- Adding comments to a drawing
Positioning Objects with Snap Functions
In Draw, objects can be accurately and consistently positioned using grid points, special snap points and lines, object frames, individual points on objects, or page edges. This function is known as Snap.
The snap function is easier to work with at the highest practical zoom value. You can use two different snap functions at the same time, for example snapping to a guideline and to the page edge. It is best, however, to activate only those functions that you really need.
This section summarizes the snap-to-grid function. For more detailed information about the snap functions, see Chapter 8 (Tips and Tricks) and Chapter 10 (Advanced Draw Techniques) in the Draw Guide.
Snap to Grid
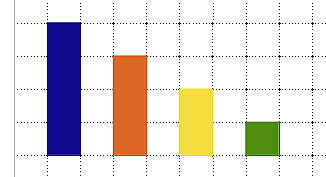
Use this function to move an object exactly to a grid point (see Figure 141). Switch this function on and off with View → Grid → Snap to Grid on the Options toolbar with the ![]() icon.
icon.
Showing the Grid
To make the grid visible, choose View → Grid → Display Grid. Alternatively, turn the grid on (or off) with the ![]() icon on the Options toolbar.
icon on the Options toolbar.
Configuring the Grid
The spacing, and resolution of the grid points can be individually chosen for each axis. The spacing between the lines is defined in the Grid options dialog (Tools → Options → OpenOffice Draw → Grid).
In the dialog shown in Figure 142, you can set the following parameters:
- Vertical and horizontal spacing of the dots in the grid. You can also change the unit of measurement used in the general Draw options (Tools → Options → OpenOffice Draw → General).
- The resolution is the size of the squares or rectangles in the grid. If the resolution is Horizontal 1 cm, Vertical 2 cm, the grid consists of rectangles 2 cm high and 1 cm wide.
- Subdivisions are additional points that appear along the sides of each rectangle or square in the grid. Objects snap to subdivisions as well as to the corners of the grid.
- The pixel size of the snap area defines how close you need to bring an object to a snap point or line before it will snap to it.
Changing the Color of the Grid Points
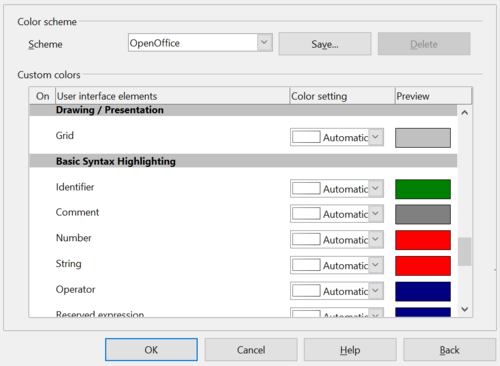
The default grid dots are light gray, which can be hard to see. To change the color of the grid points, choose Tools → Options → OpenOffice → Appearance.
In the Drawing / Presentation section, you can change the color of the grid points. On the Color Settings pull-down menu, select a more suitable/visible color, for example black.
| Content on this page is licensed under the Creative Common Attribution 3.0 license (CC-BY). |


