Editing Objects
- What is Draw?
- Parts of the main Draw window
- Choosing and defining colors
- Positioning objects with Snap functions
- Positioning objects with guiding lines
- The basic drawing shapes
- Drawing geometric shapes
- Selecting objects
- Moving and dynamically adjusting an object’s size
- Editing objects
- Using styles
- Special effects
- Combining multiple objects
- Aids for positioning objects
- Inserting and editing pictures
- Working with 3D objects
- Exporting graphics
- Adding comments to a drawing
Editing Objects
To change an object's attributes (such as color and border width) you can use the Area and Line panels of the Sidebar, the Line and Filling toolbar or the context menu.
If the Line and Filling toolbar (Figure 154) is not visible, you can display it using View → Toolbars → Line and Filling. From here you can edit the most common object attributes. You can also open the Line dialog by clicking on the Line ![]() icon and the Area dialog by clicking on the Area
icon and the Area dialog by clicking on the Area ![]() icon to see more options.
icon to see more options.
The same icons are available on the Sidebar, though the More Options icons are at the right edge of the title bar of the Line and Area panels.
| 1 Styles and Formatting | 4 Line Style | 7 Area |
| 2 Line | 5 Line Width | 8-9 Area Style / Filling |
| 3 Arrow Style | 6 Line Color | 10 Shadow |
When you select text, this toolbar changes to show text formatting options.
The Context Menu
When an object is selected, you can right-click on the object to bring up a context menu, which provides additional access to the options shown above and another way to change an object's attributes. The entries with a small arrow on the right-hand side contain a submenu.
Editing Lines and Borders
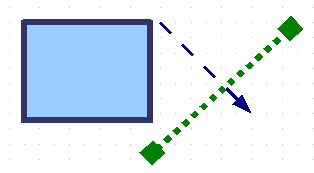
| Lines, arrows, and the borders of an object are managed through the Line dialog. An object's border is just another type of line. |
You can change some properties from the Line and Filling toolbar. To see more options, select the object and click on the Line [[Image:]] icon or right-click on the object and choose Line from the context menu. This opens the Line dialog.
Common Line Properties
In most cases the property you want to change is the line's style (solid, dashed, invisible, and so on), its color, or its width. These options are all available on the Sidebar or from the Line and Filling toolbar (Figure 154).
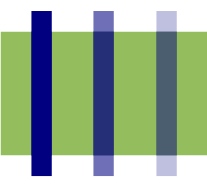
You can also edit these properties from the Line dialog, where you can also change the line's transparency. Figure 155 illustrates different degrees of transparency.
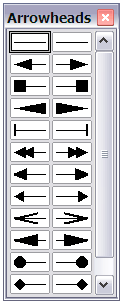
Drawing Arrows
Customizing Line and Arrow Styles
You can modify the line and arrow styles and create your own. See Chapter 4 (Changing Object Attributes) in the Draw Guide for details.
Editing the Inside (Fill) of an Object
The Apache OpenOffice term for the inside of an object is Area fill. The area fill of an object can be a uniform color, a gradient, a hatching, or an image. It can be made partly or fully transparent and can throw a shadow.
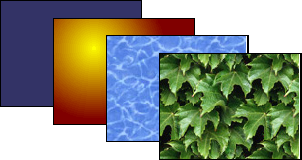
In most cases, you will choose one of the standard fill options, which are all available from the Sidebar or the Line and Filling toolbar. You can also define your own area fills; see Chapter 4 in the Draw Guide for details.
Adding a Shadow
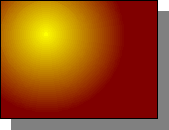
| In Draw, shadows are considered as an area property. Click on the Shadow [[Image:]] icon on the Line and Filling toolbar. This icon is not available directly on the Sidebar but the Shadow function is on the Area dialog reached through the More Options icon at the top right of the Area panel.
You can customize the position, distance, color, and transparency of shadows by using Format → Area → Shadow or by right-clicking on the selected object and choosing Area > Shadow. |
Adding Transparency
You can make objects partly or fully transparent, or even with a varying degree of transparency (as a gradient).
| Content on this page is licensed under the Creative Common Attribution 3.0 license (CC-BY). |
