Dialog page - Textures
- Creating 3D objects
- Creating 3D bodies
- Producing 3D shapes
- Editing 3D objects
- 3D settings for 3D bodies
- Dialog page - Geometry
- Dialog page - Shading
- Dialog page - Illumination
- Dialog page - Textures
- Dialog page - Material
- 3D settings for 3D shapes
- Combining objects in 3D scenes
- Examples for your own experiments
Textures are raster graphics (bitmaps) which can be used as an object property for the surface of an object. Every object of a 3D scene can have its own texture.
You can set a raster graphic as a texture for a 3D object in the same way as for a 2D object (Format > Area > Bitmaps or right-click on the object, Area, Bitmaps) – as also is the case for Gradient and Hatching. More details are found in Chapter 4 of this Guide.
If the Fill setting on the Area dialog is “Color” then the texture dialog page is inactive. Change it to Bitmap to activate the Texture page for 3D objects. If the texture is not tiled or stretched and is smaller than the object, then the remainder of the area will have the color of the Object color property on the Material page.
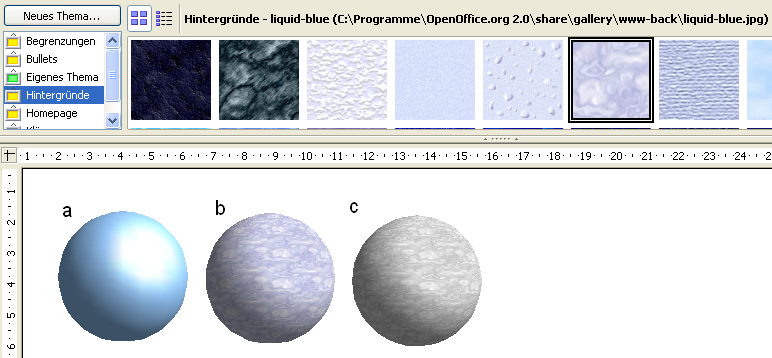
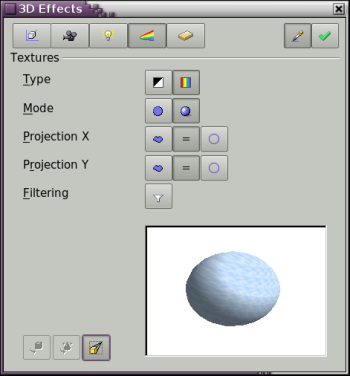
In the first row of the page (Figure 32) are two switches (Type) with which you can choose between black and white or color for the texture (see Figure 33).

Figure 33: a - standard color setting, b - texture (color), c - texture (black and white)
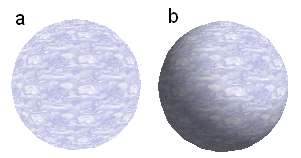
With the two switches in the row Mode you can control whether the texture of the selected objects is rendered with light and shadows (Switch 2) or not (Switch 1) – see Figure 34. By means of appropriate lighting and shading adjustments the graphic object is more realistically rendered.

Figure 34: Texture without (a) and with (b) lighting and shadow effects
Projection X / Y
With one of the three buttons you can determine how the texture for this coordinate axis should be projected onto the object. The default setting, object specific, will in general give the best result. Examples of the use of each button are shown below.
| [[Image:]] | Object specific | The texture will be automatically adjusted to best fit with the form and size of the object. |
| [[Image:]] | Parallel | The texture will be projected parallel to the axis of the object. It will be mirrored on the rear side of the object. |
| [[Image:]] | Circular | The axis of the texture pattern is wrapped around the object. |
With a rotation body the turning axis is the Z axis and the wrapping in the X direction; with an extrusion body the extrusion direction is the Z axis and the surface, which was extruded, is the X direction. In this way different positions of the texture result, depending on how the object was produced.
[[Image:|Image:]]
{| class="prettytable" | Area fill without tiling, with adjustments | Projection X | Projection X | Projection X |- | Projection Y | | | |- | Projection Y (Difference is small) | | Front and rear side | |} Figure 36: Cylinder as a rotation body
The button Filter [[Image:]] switches on and off a soft-focus filter. It can often remove slight faults and errors in the texture.
[[Image:|Image:]]
{| class="prettytable" | Area fill without tiling, with adjustments | Projection X | Projection X | Projection X |- | Projection Y | | | |- | Projection Y (Difference is small) | | Upper and under sides | |} Figure 37: Cylinder as an extrusion object
| Content on this page is licensed under the Creative Common Attribution 3.0 license (CC-BY). |
