Creating Dialogs
To create a dialog in the Basic IDE, right-click the Module1 tab at the bottom of the Basic source editor and select Insert → Basic Dialog. The IDE creates a new page named Dialog1:
Our dialog shall offer a more convenient way to select a file than the simple input box of our first example. Furthermore, the user shall be able to control how the picture is anchored in the text after inserting it. For this, we will create a wizard dialog with two steps.
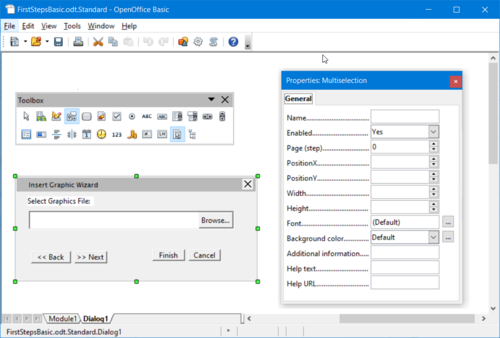
Now the dialog looks similar to the illustration below:
| Test the dialog using the Activate Test Mode icon from the design tool window. After you have finished the test, click the Close button of the test dialog window. |
To edit the dialog, such as setting the title and changing the size, select it by clicking the outer border of the dialog. Green handles appear around the dialog. The green handles can be used to alter the dialog size. The Properties Dialog is used to define a dialog title and other dialog properties.
| Content on this page is licensed under the Public Documentation License (PDL). |

