Creating a New Presentation
From Apache OpenOffice Wiki
- What is Impress?
- Starting Impress
- The main Impress window
- Workspace views
- Creating a new presentation
- Formatting a presentation
- Adding and formatting text
- Adding pictures, tables, charts, media files, and other objects
- Working with master pages and styles
- Adding comments to a presentation
- Setting up the slide show
- Running a slide show
Creating a New Presentation
This section describes how to start a new presentation using the Presentation Wizard.
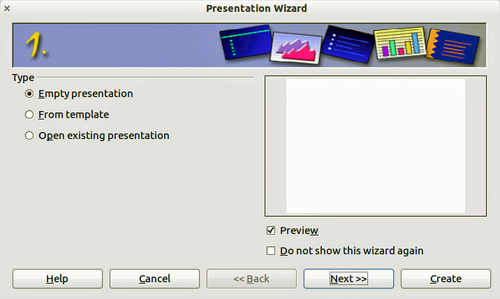
When you start Impress, the Presentation Wizard appears.
Figure 118. Choosing the type of presentation
- Under Type, choose one of the options. These options are covered in the Impress Guide.
- Empty presentation creates a blank presentation.
- From template uses a template design already created as the basis for a new presentation. The wizard changes to show a list of available templates. Choose the template you want.
- Open existing presentation continues work on a previously created presentation. The wizard changes to show a list of existing presentations. Choose the presentation you want.
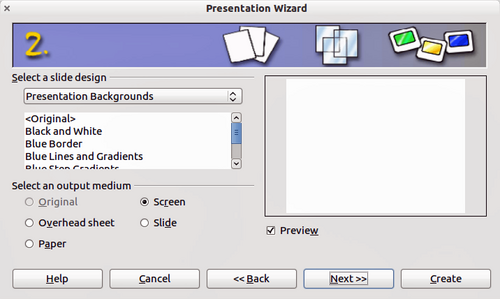
- Click Next . Figure 119 shows the Presentation Wizard step 2 as it appears if you selected Empty Presentation at step 1. If you selected From template, an example slide is shown in the Preview box.
- Choose a design under Select a slide design. The slide design section gives you two main choices: Presentation Backgrounds and Presentations. Each one has a list of choices for slide designs. If you want to use one of these other than <Original>, click it to select it.
- The types of Presentation Backgrounds are shown in Figure 119. By clicking an item, you will see a preview of the slide design in the Preview window. Impress contains three choices under Presentations: <Original>, Introducing a New Product, and Recommendation of a Strategy.
- <Original> is for a blank presentation slide design.
- Both Introducing a New Product and Recommendation of a Strategy have their own prepackaged slide designs. Each design appears in the Preview window when its name is clicked.
| Introducing a New Product and Recommendation of a Strategy can also be used to create a presentation by choosing From template in the first step (Figure 118). |
- Select how the presentation will be used under Select an output medium. Most often, presentations are created for computer screen display. Select Screen. You can change the page format at any time.
- Click Next . The Presentation Wizard step 3 appears (Figure 120).
- Choose the desired slide transition from the Effect drop-down menu.
- Select the desired speed for the transition between the different slides in the presentation from the Speed drop-down menu. Medium is a good choice for now.
- Click Create . A new presentation is created.
| If you selected From template on step 1 of the Wizard, the Next button will be active on step 3 and other pages will be available. These pages are not described here. |
| Content on this page is licensed under the Creative Common Attribution 3.0 license (CC-BY). |


