Using paragraph styles
First steps
OpenOffice.org uses a tool called Styles and Formatting to manage styles. The concept of styles and the Styles and Formatting window is best explained through an example.
- Create a new document (choose File > New > Text Document or press Control+N).
- Type Heading 1 in it. Make sure that the cursor remains in that same line.
- Click the Styles and Formatting icon
 located on the Formatting Bar or press the F11 key. This opens the Styles and Formatting window.
 - Make sure the window is showing the Paragraph Styles section (click on the top-left icon of the Styles and Formatting window
 ).
).
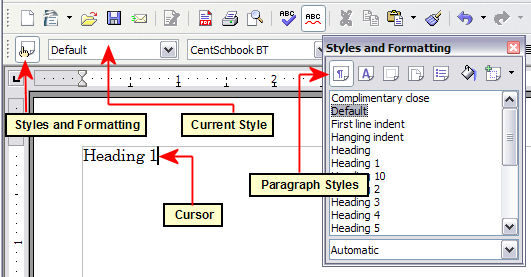
Click on the Styles and Formatting icon to bring up the window.
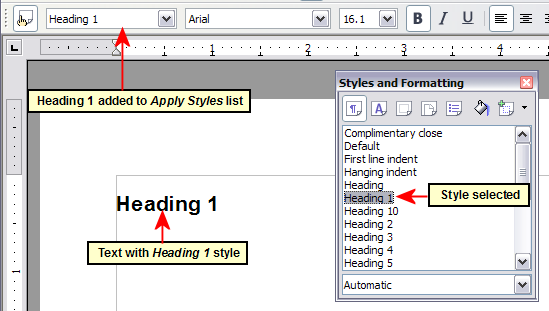
Double-click the Heading 1 entry of Styles and Formatting. This will do two things:
- Give the line you typed the Heading 1 style.
- Add Heading 1 to the Apply Style menu.
The Apply Style menu is illustrated in the next section. It provides direct access to the styles that are currently in use in the document.
The Apply Style menu lists the paragraph styles that are currently in use in the document. You can select styles from this menu, just like with the Styles and Formatting window. As an exercise, press Enter, type some text and select Heading 1 in the Apply Styles list. The text acquires the properties of the Heading 1 style.
Modifying paragraph styles
The power of styles lies in the ability to modify them to suit your needs. For the next example, we will need three lines of text with three OOo-supplied paragraph styles: Heading 1, Heading 2, and Heading 3. These paragraph styles could be used in formating headings in the framework for a document that will be "fleshed out" afterwards. Your document should resemble the illustration below.
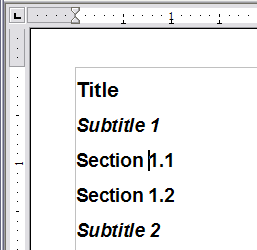
Headings 1–3 with default styles.
Open a new text document for this exercise and type Title on the first line, click the Paragraph Styles icon on the Styles and Formatting window, and double-click Heading 1 in the drop-down list. Repeat this procedure for the other entries, using the proper paragraph style for each. The Heading 1 style should be applied to the "paragraph" containing the word Title, Heading 2 to Subtitle 1, and so on.
Note: Heading 1 uses a bold font typeface, Heading 2 uses a 14pt bold italic typeface, and Heading 3 uses a 14pt bold typeface.
Suppose you decide to make some changes to these styles:
- Heading 1 should be centered.
- Heading 3 should be indented.
Center Heading 1
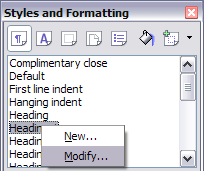
On the Styles and Formatting window, select the Paragraph Styles icon (if it isn't already chosen), right-click on Heading 1, and choose Modify.
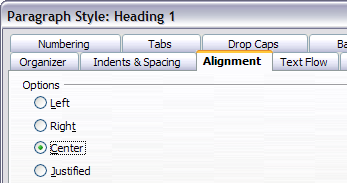
When the Paragraph Style window opens, choose the Alignment tab, select Center, and click OK.
Now, everything marked as Heading 1 will be centered. If you make another Heading 1 entry, it will be centered as well.

Text with the Heading 1 style centered.
Indent Heading 3
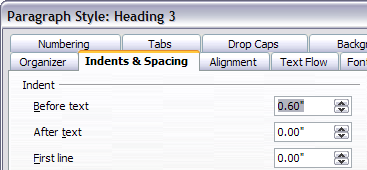
On the Styles and Formatting window, right-click on the Heading 3 paragraph style and choose Modify (as before). When the Paragraph Style window opens, follow the steps below:
- Click the Indents & Spacing tab.
- Under the Indent section, set the indentation before the text to 1.50cm (0.6 in).
The result should resemble the illustration below.
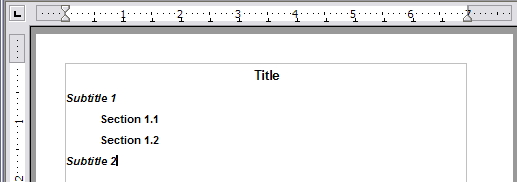
The text with Heading 3 style is indented.
Linked styles
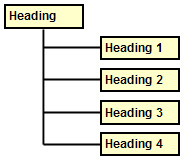
Some OpenOffice.org styles are linked together. This means that a change in one style affects every style linked to to it. For example, every Heading style (such as Heading 1, Heading 2) is linked with a style called Heading. This relationship is illustrated below.
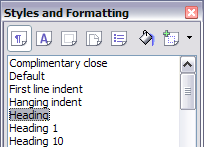
As an example, suppose you want to change the font of not only Heading 1, or Heading 2, but all headings. The easiest way to do that is to take advantage of this linking. Open the Styles and Formatting window (press F11) and select Heading.
Open the Paragraph Style dialog box for the Heading style (right-click > Modify) and select the Font tab. Select a font and click OK.
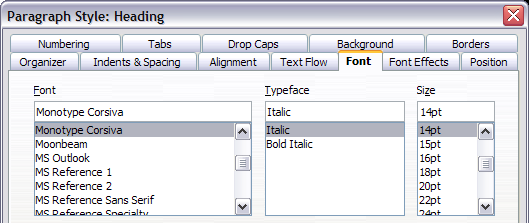
Select font for Heading style.
Now, the fonts of all the heading styles have been changed in a single operation. Your document should now resemble the illustration below.
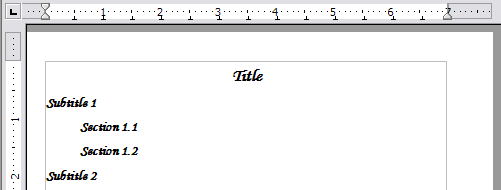
All Heading styles now have the new font.
| Content on this page is licensed under the Creative Common Attribution 3.0 license (CC-BY). |
