Impress workspace
You already know about the first view of Workspace: Normal. All of your work so far has been done in that view, one slide at at time. These other views of Workspace allow you to perform other tasks.
Normal view
There are two ways to place a slide in the Slide Design area of the Normal view: clicking the slide thumbnail in the Slides pane, or using the Navigator. To open the Navigator, click the Navigator button in the Standard Toolbar ![]() . To select a slide, scroll down the Navigator list until you find it and the double-click it.
. To select a slide, scroll down the Navigator list until you find it and the double-click it.
Outline view
The Outline view contains all of the slides of the presentation in their numbered sequence. Only the text in each slide is shown. Slide names are not included.
The Outline view serves at least two purposes.
- Making changes in the text of a slide:
- You can add and delete the text in a slide just as you would in the Normal view.
- You can move the paragraphs of text in the selected slide up or down by using the up and down arrows (Figure 11).
- You can change the Outline Level for any of the paragraphs in a slide using the left and right arrows.
- The slides can be compared with your outline. If you notice from your outline that another slide is needed, you can return to the Normal view to create the slide. Then return to reviewing all the slides against your outline in the Outline view.
- If a slide is not in the correct sequence, you can move it to its proper place.
- Click the slide icon of the slide you are moving.
- Drag and drop it where you want it.
Notes view
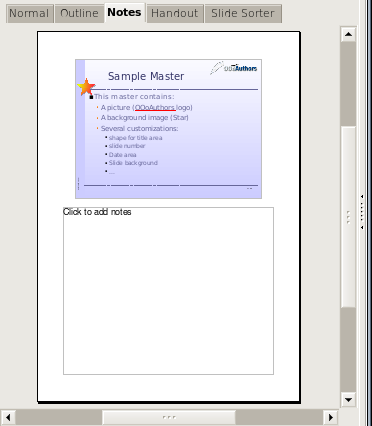
The Notes view is used to add notes to a slide. At the present time, they are not visible to the person running the slide show. They can be printed out as part of a handout, but this is not an easy task.
To add notes to a slide:
- Click the Note tab in the Workspace.
- Select the slide to which you will add notes.
- Double-click the slide in the Slide pane, or
- Double-click the slide's name in the Navigator.
- Type the notes in the text box below the slide.
Slide Sorter view
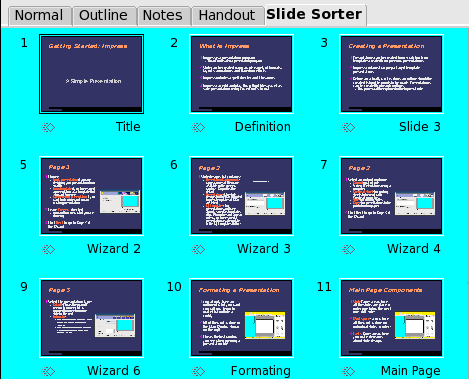
Slide Sorter view contains all of the slide thumbnails. This view allows the selection of multiple slides for the purpose of changing the order. It is also possible to work on one slide at a time.
Change the number of slide per row if desired.
- Check View > Toolbars > Slide View to make the Slide view toolbar visible.
- Adjust the number of slides.
- When you have adjusted the number of slide per row, View > Toolbars > Slide View will remove this toolbar from view.
To move a slide in a presentation in the Slide Sorter:
- Click the slide. A thick black border is drawn around the selected slide.
- Drag and drop it to the location you want.
- As you move the slide, a black vertical line appears to one of the sides of the slide.
- Drag the slide until this black vertical line is located where you want the slide.
To select a group of slides:
- Click the number of the first slide.
- Hold down the left mouse button.
- Drag the cursor to the last slide thumbnail. A dashed outline of a rectangle forms as you drag the cursor through the slide thumbnails. Make sure the rectangle includes all the slides you want to select.
To move a group of slides:
- Select the group.
- Drag and drop the group to their new location. The same vertical black line appears to show you where the group of slides will go.
| Selection of a group of slides works in a rectangular fashion. For example: slides 1, 2 ,3, 5, 6, and 7 can be selected, but slides 1, 2, 5, 6, and 7 can not. |
You can work with slides in the Slide Sorter view just as you can in the Slide pane. To make changes, right-click a slide and do the following using the pop-up menu:
- Add a new slide after the selected slide.
- Delete the selected slide.
- Change the Slide Layout.
- Change the Slide Transition.
- For one slide, click the slide to select it. Then add the desired transition.
- For more than one slide, select the group of slides and add the desired transition.
- Hide the selected slide. It will not be shown in the slide show.
- Copy and paste a slide.
- Cut and paste a slide.
Handouts view
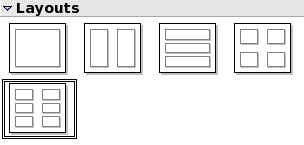
This view is for setting up the layout of your slide for a printed handout. Layout contains five choices: one, two, three, four, and six slides per page. If you want to include slide notes with your handout, consult the Impress Guide. This involves advanced techniques.
To print a handout:
- Select the slides using the Slide Sorter. (Use the steps listed in selecting a group of slides in Slide Sorter.)
- Select File > Print or press Control+P.
- Select Options in the bottom left corner.
- Check Handout and click OK.
- Select Print Range.
- Click OK in the Print window.
| By selecting a single slide, it is possible to print it and any notes it contains. Printing the entire presentation and all of its notes is beyond the scope of this document. |
| Content on this page is licensed under the Creative Common Attribution 3.0 license (CC-BY). |


