Drawing connectors
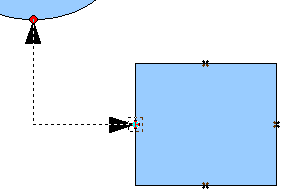
When you choose a connector from the toolbar, the mouse pointer changes to ![]() . As you move the cursor over an object you can see the available connection (glue) points. To connect two shapes move the mouse cursor over a gluepoint, click on it with the left mouse button to establish the first point, and then drag the mouse cursor (left button still pressed) to the other gluepoint and release the mouse button. The ends of the line are now docked and the connection is established (see Figure 10).
. As you move the cursor over an object you can see the available connection (glue) points. To connect two shapes move the mouse cursor over a gluepoint, click on it with the left mouse button to establish the first point, and then drag the mouse cursor (left button still pressed) to the other gluepoint and release the mouse button. The ends of the line are now docked and the connection is established (see Figure 10).

Figure 10: Gluing a connector to a shape.
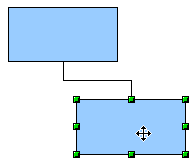
You can also place the beginning or the end of a connector to the middle of an object. This is useful when the final position of the object is not yet fixed. When you move the object Draw will automatically select the optimal location for the connector ends (see Figure 11).


Figure 11: Connector attached to the middle of an object.
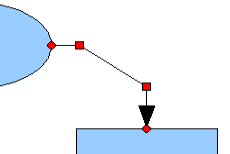
As with all other objects, connectors have one or more control points to simplify the construction of the drawing. You can use these points to change the shape, length and proportions of the connector line (see Figure 12).

Figure 12: Control points of a connector.
To remove a connector from an object, either move the end of the connector from the glue point of the object or simply delete the connector entirely.
| Content on this page is licensed under the Creative Common Attribution 3.0 license (CC-BY). |