Modifying styles
Writer provides several predefined styles, but you may find that they do not fit in one way or another your preferences. You can build your own library of custom styles to use in place of the predefined ones, or you can modify the existing styles. OOo offers four mechanisms to modify both both predefined and custom (user-created) styles:
- Update a style from a selection.
- Load or copy styles from another document or template.
- Change a style using the Style dialog box.
- Use AutoUpdate (paragraph and frame styles only).
The first two methods are discussed in Update Style (from a selection) and Load Styles (from a template or document), while Chapter 7 (Working with Styles) discusses at length the process of creating a new style.
This section shows how you can quickly make simple modifications to existing paragraph styles using the same tools you would use for applying formatting manually.
| Any changes made to a style are effective only in the current document. If you want to reuse modified or new styles in other documents, you need to either save the styles in a template—see Chapter 10 (Working with Templates)—or copy the styles into the other documents, as described in Copying and moving styles. |
Changing a style using the Style dialog box
To change an existing style using the Style dialog box, right-click on the style in the Styles and Formatting window and select Modify from the pop-up menu.
The dialog box displayed depends on the type of style selected. The figure below shows an example of the dialog box for a paragraph style. Each style’s dialog box has several tabs. The various properties on these dialog boxes are described in the next chapter.
Move to the page where the setting you want to modify is specified and input the new value. You can click the Help button at any time to bring up the online guide where all the options of the current page are briefly described. When you are done, click OK to close the dialog box. As discussed above, the great advantage of styles is that all the instances of such style in your document are now modified to your liking.
Examples: Modifying paragraph styles
For this example, we need three lines of text with three OOo-supplied paragraph styles: Heading 1, Heading 2, and Heading 3. These paragraph styles could be used in formating headings (subheads) in the framework for a document that will be “fleshed out” afterwards.
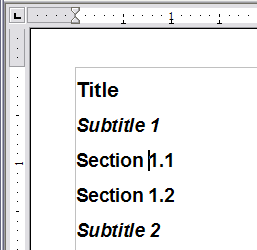
Open a new text document for this exercise and type Title on the first line, click the Paragraph Styles icon on the Styles and Formatting window, and double-click Heading 1 in the drop-down list. Repeat this procedure for the other entries of Figure 14, using the proper paragraph style for each: the Heading 1 style for the paragraph containing the word Title, Heading 2 for Subtitle 1, and so on.
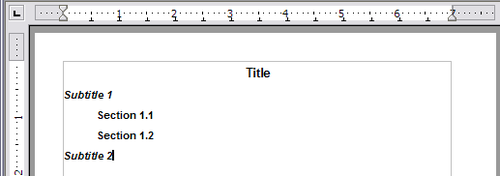
Your document should resemble the figure below.
Suppose you decide to make some changes to these styles, namely:
- Heading 1 should be centered.
- Heading 3 should be indented.
Center Heading 1
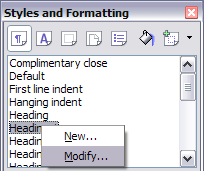
On the Styles and Formatting window, select the Paragraph Styles icon (if it isn’t already chosen), right-click on Heading 1, and choose Modify (as shown below).
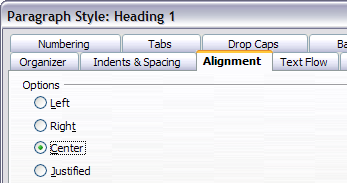
After the Paragraph Style window opens, choose the Alignment tab, select Center (as shown below), and click OK.
Now, every paragraph marked as Heading 1 will be centered (as shown in Figure 17). If you make another Heading 1 entry, it will be centered as well.
Indent Heading 3
On the Styles and Formatting window, right-click on the Heading 3 paragraph style and choose Modify (as before). After the Paragraph Style dialog box opens, follow the steps below:
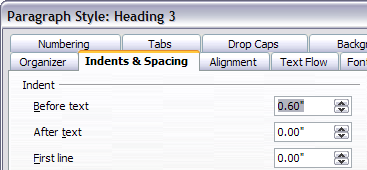
- Click the Indents & Spacing tab.
- Under the Indent section, set the indentation before the text to 0.60", as shown below. Your display might be different, depending upon what measurement unit was set in the options (Tools > OOo Writer > General > Settings).
The result should resemble the figure below.
Using AutoUpdate
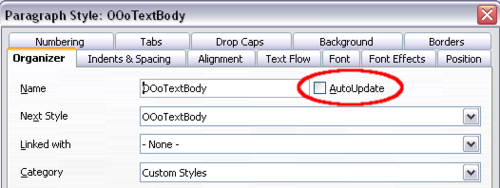
On the Organizer page of the Paragraph Style dialog box is a check box named AutoUpdate. It is present only for paragraph and frame styles. If this check box is selected, then OOo will apply to the style itself any modification made manually to a paragraph formatted with that style.
| If you are in the habit of manually overriding styles in your document, be sure that AutoUpdate is not enabled, or you will suddenly find whole sections of your document reformatting unexpectedly. |
| Content on this page is licensed under the Creative Common Attribution 3.0 license (CC-BY). |

