Autoformatting cells and sheets
From Apache OpenOffice Wiki
- Parts of the main Calc window
- Starting new spreadsheets
- Opening existing spreadsheets
- Saving spreadsheets
- Navigating within spreadsheets
- Selecting items in a sheet or a spreadsheet
- Working with spreadsheets
- Viewing Calc
- Entering data using the keyboard
- Speeding up data entry
- Editing data
- Formatting data
- Autoformatting cells and sheets
- Formatting spreadsheets using themes
- Hiding and showing data
- Sorting records
- Printing from Calc
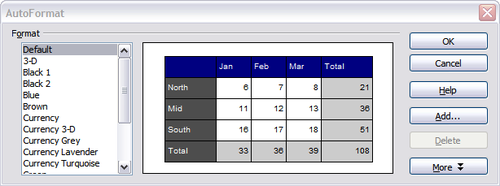
You can use the AutoFormat feature to quickly apply a set of cell formats to a sheet or a selected cell range.
- Select the cells, including the column and row headers, that you want to format.
- Choose Format > AutoFormat.
- To select which properties (number format, font, alignment, borders, pattern, autofit width and height) to include in an AutoFormat, click More. Select or deselect the required options.
- Click OK.
If you do not see any change in color of the cell contents, choose View > Value Highlighting from the menu bar.
Defining a new AutoFormat
You can define a new AutoFormat that is available to all spreadsheets.
- Format a sheet.
- Choose Edit > Select All.
- Choose Format > AutoFormat. The Add button is now active.
- Click Add.
- In the Name box of the Add AutoFormat dialog, type a meaningful name for the new format.
- Click OK to save. The new format is now available in the Format list in the AutoFormat dialog.
| Content on this page is licensed under the Creative Common Attribution 3.0 license (CC-BY). |
