Splitting complex drawings on multiple layers
- Positioning objects with Zoom
- Positioning objects with snap functions
- Snap to grid
- Snap to snap objects
- Other snap functions
- Positioning objects with helper lines
- Drawing to scale
- Splitting complex drawings on multiple layers
- Example: house plan and furniture
- Multi-page document
- Using page backgrounds
- Color palette
- Using the color picker dialog
- Cool effects
Layers are like transparencies which lie one on top of another on an overhead projector. You can insert and extract single layers as desired. For example in architecture the floor plan, heating and electrical wiring can all be on separate layers. With complex drawings this layer technique offers many advantages. You can make layers visible or invisible as needed or you can protect a layer from further changes while you work.
In Draw three layers are always present by default: Layout, Controls, and Dimension Lines.
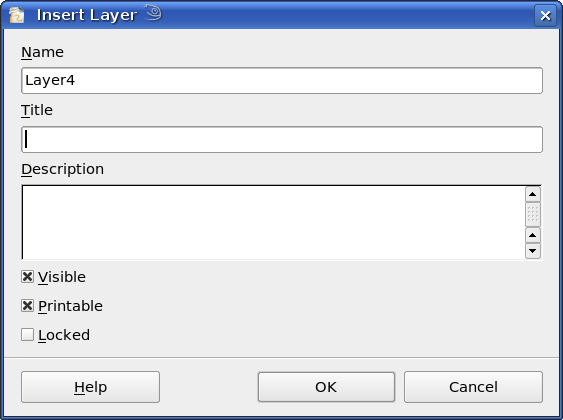
To change to a layer, click on its tab. Everything which is drawn will be placed on the currently selected layer (usually “Layout” – this is the default layer when you create a new drawing). The Controls layer is for control elements (for example icons, pull downs etc) and is not usually used for ordinary drawing elements. The Dimension Lines layer is used whenever you insert a dimension line on a drawing (unless the layer is made invisible). With the command Insert > Layer you can insert a new layer in a drawing (Figure 17 top).


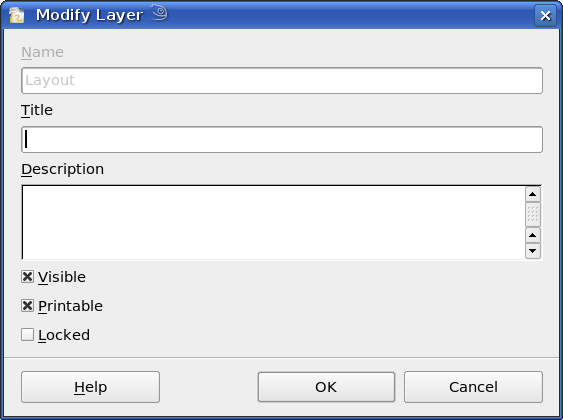
Figure 17: Insert and Modify layers
Right-click on a layer tab to bring up a menu where you can insert or delete a layer, rename an existing layer, or modify it. You can change the names of the user-defined layers; the default layer names cannot be changed.
If you choose Modify you will see the dialog box in Figure 17 bottom. On the Modify Layer dialog you can specify the following properties:
- Visible: If this property is not activated the layer will not be shown (the layer is removed from the stack)
- Printable: If this property is not activated the layer will not be printed. This useful if you use a 'draft' layer for guides or annotations that you use in making the drawing but should not appear in the final output.
- Protected: All objects on this layer are protected from deletion, editing or moving. No additional objects can be added to a protected layer. This property is useful when a base plan is to be protected while adding a new layer with other details.
| Somewhat confusing is the fact that you can move objects on one layer although you are working on another layer. To prevent deleting or moving objects on another layer you should protect that layer. |
| Content on this page is licensed under the Creative Common Attribution 3.0 license (CC-BY). |
