Documentation/OOoAuthors User Manual/Writer Guide/Using automatic cross-references
- Quick and easy field entry
- Using document properties to hold information that changes
- Using other fields to hold information that changes
- Using AutoText to insert often-used fields
- Defining your own numbering sequences
- Using automatic cross-references
- Using fields in headers and footers
- Using fields instead of outline numbering for chapter numbers
- Tricks for working with fields
- Developing conditional content
- Using placeholder fields
Using automatic cross-references
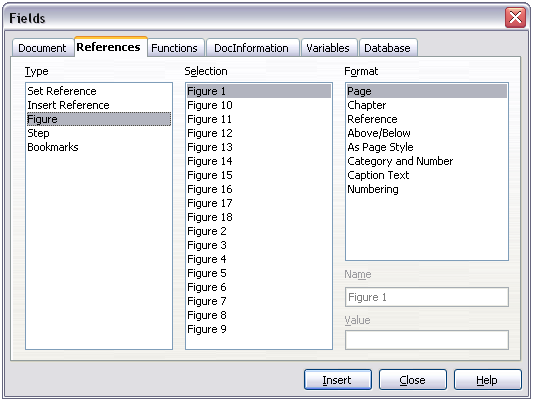
If you type in references to other parts of the document, those references can easily get out of date if you reword a heading, add or remove figures, or reorganize topics. Replace any typed cross-references with automatic ones and, when you update fields, all the references will update automatically to show the current wording or page numbers. The References tab of the Fields dialog box lists some items, such as bookmarks, figures, tables, and user-defined number range variables. Other items that you might expect to be listed, such as headings, are not shown.

The References tab of the Fields dialog box.
Prepare items as targets for cross-referencing
Before you can insert a cross-reference to anything that is not automatically shown on the References tab, such as a heading, you must prepare or “set” that heading as an item to be referenced. To do this, you can either use bookmarks or set references.
Using bookmarks
Bookmarks are listed in the Navigator and can be accessed directly from there with a single mouse click. In HTML documents, bookmarks are converted to anchors that you can jump to via hyperlink.
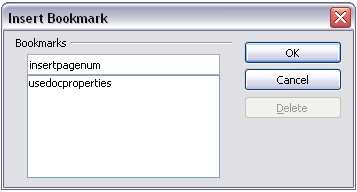
- Select the text you want to bookmark. Click Insert > Bookmark.
- On the Insert Bookmark dialog box, the larger box lists any previously defined bookmarks. Type a name for this bookmark in the top box. Click OK.
Setting references
- Click Insert > Cross reference.
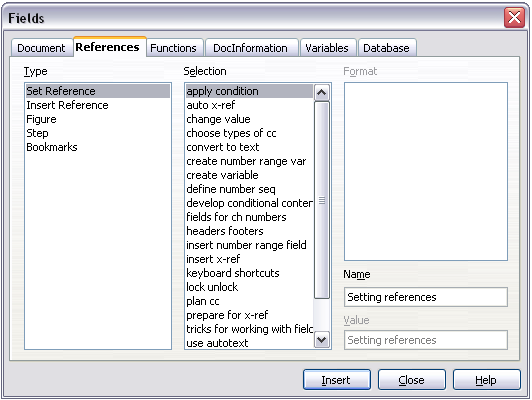
- On the References tab of the Fields dialog box, click Set Reference in the Type list. The Selection list shows any references that have been defined. You can leave this page open while you set many headings as references.
- Click in the document and highlight the text of the first heading to be used as a target for a cross-reference. Click on the Fields dialog box. The text of the heading will appear in the Value box in the lower right of the dialog box. In the Name box, type some text by which you can identify this heading.
- Click Insert. The text you typed in the Name box now appears in the Selection list.
- Repeat steps 3 and 4 as often as required.

Setting text to be used as a target for a cross-reference.
Insert cross-references
To insert a cross-reference to a heading or other text:
- In your document, place the cursor where you want the cross-reference to appear.
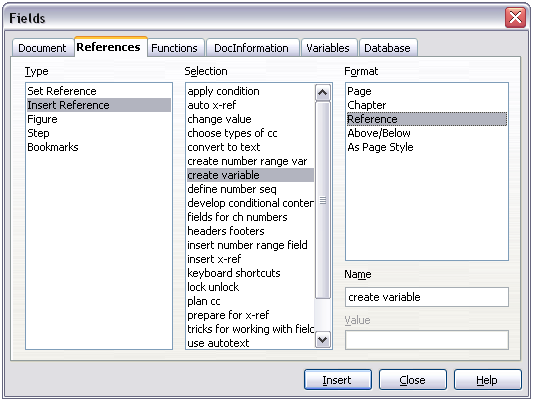
- If the Fields dialog box is not open, click Insert > Cross Reference. On the References tab of the Fields dialog box, in the Type list, click Insert Reference or Bookmarks (depending on how you set your references). You can leave this page open while you insert many cross-references.
- Click on the required item in the Selection list, which shows the bookmarks or references that have been defined. In the Format list, choose the type of reference required. Usually this will be Reference (to insert the full text of the reference or bookmark) or Page (to insert the number of the page the referenced or bookmarked text is on). Click Insert.

Inserting a cross-reference to a heading.
To insert a cross-reference to an item (such as a figure caption) that you have previously inserted into the document as a numbering-sequence field:
- In your document, place the cursor where you want the cross-reference to appear. If the Fields dialog box is not already open, click Insert > Cross-reference.
- On the References tab of the Fields dialog box, select Figure in the Type list.
- Click on the required item in the Selection list, which shows the list of figures that have previously been inserted into the document. The Format list shows different choices from those given for headings. Choose the type of reference required. Usually this will be Category and Number (to insert the word “Figure” and its number), Reference (to insert the word “Figure” with its number and the full text of the caption), or Page (to insert the number of the page the figure is on).
- Click Insert.
| Content on this page is licensed under the Creative Common Attribution 3.0 license (CC-BY). |
