Working with styles
This section describes how to create, modify, apply and delete styles in Impress. If you are familiar with styles in Writer, you will find both similarities and differences in Impress. The presentation styles are similar to paragraph styles in Writer and are used in a very similar fashion. You cannot create new presentation styles but you can fully configure the existing ones. Note that, as for the Heading styles in Writer, the Outline styles are hierarchically linked, so a change in the Outline 1 will cascade through all the other Outline levels.
In Impress you will also find the graphic styles very useful. As the name suggests, graphic styles define the characteristics of a graphic object (including a text object). If, for example, you need to create a organization chart diagram in one of the slides of your presentation, you will surely want all the boxes to have consistent appearance, meaning same line style, same font type, maybe same shadow and so on. The easiest way to achieve this result with the minimum effort is to create a graphic style for the boxes and apply it to each box. The major benefit is that if later on you decide to modify, say, the background color of the boxes, all you need to do is modify the style.
Creating graphics styles
As discussed above you cannot create new presentation styles. You can create a new graphics style in two ways:
Creating a new style using the Style dialog
Choose the Graphics icon at the top of the Styles and Formatting window.
To link a new style with an existing style, first select that style, and then right-click and select New.
When styles are linked, then when you change the base style (for example, by changing the font from Times to Helvetica), all the linked fonts will change as well. Sometimes this is exactly what you want; other times you do not want the changes to apply to all the linked styles. It pays to plan ahead.
The style dialog is shown below. It has 14 tabs, each with several options. If you are familiar with styles in Writer, you will find that you already know how to set many of these options. When you are finished making changes, click OK to save those changes.

Dialog to create a new graphics style.
Creating a new style from a selection
You can create a new style from manually formatted text or graphics:
- Select the item you want to save as a style.
- In the Styles and Formatting window, click the New Style from Selection icon, highlighted below.
- In the Create Style dialog that pops up, type a name for the new style. The list shows the names of existing custom styles of the selected type. Click OK to save the new style.

New Style from Selection.

Naming a new style created from a selection.
Modifying styles
To change an existing style, right-click on it in the Styles and Formatting window and choose Modify from the pop-up menu. (For Presentation styles, Modify is the only choice.)
The dialog for the modification of a graphic style is the same as the one for creating a graphic style; while the dialog for modifying a presentation style is simpler and more similar to the one to modify a paragraph style in Writer.
Make the required changes to the style and when finished click OK to save them.
Updating a style from a selection
To update a style from a selection:
- Select an item that has the format you want to adopt as a style.
- In the Styles and Formatting window, select the style you want to update (single-click, not double-click), and then click the Update Style icon.
Updating a style from a selection.

Tip: Any changes you make to a style are effective only in the document on which you are working. The changes do not go into any associated template. If you want the changes to apply to more than one document, you need to change the template (see Working with templates).
The Update Style button is available for both presentation and graphic styles.
Applying styles
In Impress you can apply styles in two ways, both starting from the Styles and Formatting window. First click on one of the icons at the top left (Graphics Styles or Presentation Styles) to display a list of styles in the category you want. Then do one of the following:
- Position the insertion point in the paragraph or graphic and double-click on the name of the style you want to apply.
- Click the Fill Format mode icon inline:graphics27.png . The mouse pointer changes to this icon. Position the moving icon on the paragraph to be styled and click the mouse button. This mode remains active until you turn it off, so you can apply the same style to several paragraphs. To quit Fill Format mode, click the Fill Format mode icon again or press the Esc key.
When Fill Format mode is active, a right-click anywhere in the document undoes the last Fill Format action. Be careful not to accidentally right-click and thus undo actions you want to keep.
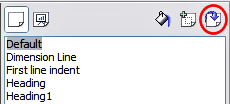
Tip: At the bottom of the Styles and Formatting window is a dropdown list (in Figure 1 the window shows All, meaning the list includes all available styles. You can choose to show all styles or other groups of styles, for example applied styles or (in the case of graphics styles) custom styles.
Deleting styles
You cannot remove (delete) any of OOo's predefined styles, even if you are not using them.
You can remove any user-defined (custom) styles; but before you do, you should make sure the styles are not in use. If an unwanted style is in use, you will want to replace it with a substitute style.
To delete unwanted styles, right-click on them (one at a time) in the Styles and Formatting window and click Delete on the pop-up menu. Click Yes in the message box that pops up.
Assigning styles to shortcut keys
OOo provides a set of predefined keyboard shortcuts which allow you to quickly apply styles while typing in a document. You can redefine these shortcuts or define your own, as described in Appendix A (Keyboard Shortcuts).
| Content on this page is licensed under the Creative Common Attribution 3.0 license (CC-BY). |