Dynamic gradients
You can control transparency gradients in the same manner as color gradients. Both types of gradient can be used together. With a transparency gradient the direction and degree of an object’s fill color changes from opaque to transparent (in a regular gradient, the fill changes from one color to another, but the degree of transparency remains the same).
If you have assigned transparency to an object with a color fill, you can control the transparency by clicking on the transparency icon ![]() . To define a transparent gradient, select an object, choose a transparency fill from the Line and Filling toolbar, The transparency icon is now active. When you click on this icon, a dashed line connecting two squares appears on the object. Move the two squares to modify the gradient. You can define the direction of the gradient (vertical, horizontal, or at any angle) and the spot at which the transparency begins.
. To define a transparent gradient, select an object, choose a transparency fill from the Line and Filling toolbar, The transparency icon is now active. When you click on this icon, a dashed line connecting two squares appears on the object. Move the two squares to modify the gradient. You can define the direction of the gradient (vertical, horizontal, or at any angle) and the spot at which the transparency begins.
In the same manner, to define a regular gradient, select an object, choose a gradient fill from the Line and Filling toolbar, The gradient icon ![]() is now active. When you click on the gradient icon, a dashed line connecting two squares appears on the object, just as it does for a transparency gradient.
is now active. When you click on the gradient icon, a dashed line connecting two squares appears on the object, just as it does for a transparency gradient.
In both cases a dashed line connecting two small squares appears on top of the object. Click outside the object to set the gradient.
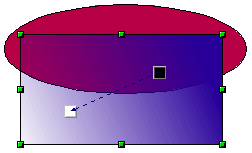
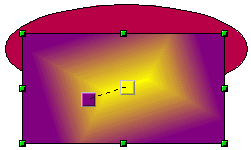
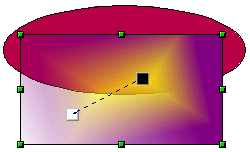
The three examples in Figure 35 demonstrate how the type and degree of transparency can be controlled.
Figure 35: Dynamic gradients.
| Content on this page is licensed under the Creative Common Attribution 3.0 license (CC-BY). |


