Editing lines and borders
Lines and borders
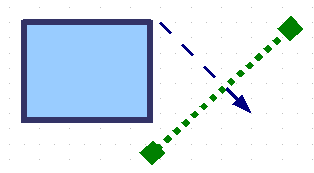
Lines (like arrows) and the borders of an object are managed through the same dialog. An object’s border is just another type of line.
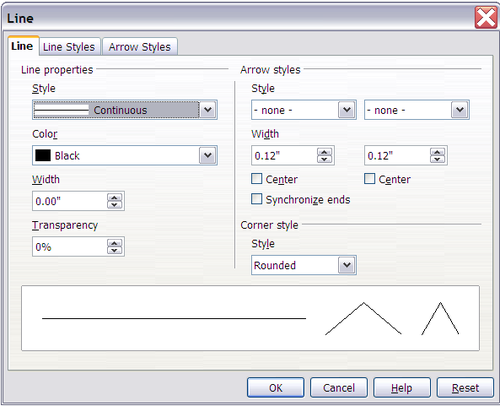
You can change some properties from the Line and Filling toolbar. To see more options, select the object and click on the ![]() icon or right-click on the object and choose Line from the context menu. This opens the Line dialog.
icon or right-click on the object and choose Line from the context menu. This opens the Line dialog.
Common line properties
In most cases the property you want to change is the line’s style (solid, dashed, invisible, etc), its color, or its width. These options are all available from the Line and Filling toolbar.
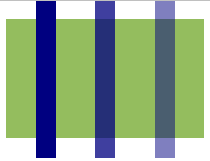
You can also edit these properties from the Line dialog. They are on the first tab, left column (see Figure above). From the Line dialog you can also change the line’s transparency. Figure 5 below illustrates different degrees of transparency.
Drawing arrows
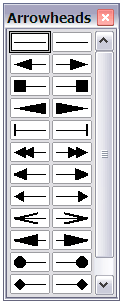
Arrowheads (and other line endings – usually referred to in this Guide collectively as arrows) are a line property. Select a line and click on the ![]() button. This opens the Arrowheads menu. There are several types of arrowheads available. Each end of the line can have a different arrowhead (or no arrowhead).
button. This opens the Arrowheads menu. There are several types of arrowheads available. Each end of the line can have a different arrowhead (or no arrowhead).
In the Line dialog (see Figure 3), Arrow styles on the right-hand side contains a number of options to fine tune the arrow properties. If Synchronize ends is selected, both line endings will have the same appearance. The option Center brings the middle of the arrow over the end point of the line. If this checkbox is not selected, the line ends on the outermost edge of the arrow. It is much easier to understand if you look at the following sketch.
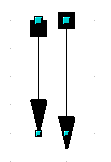
Figure 7: Default arrowheads (left) vs Centered arrowheads (right).
Customizing line and arrow styles
You are not constrained to using only the line and arrow styles provided by default in Draw. You can modify the styles and create your own.
Customizing line styles
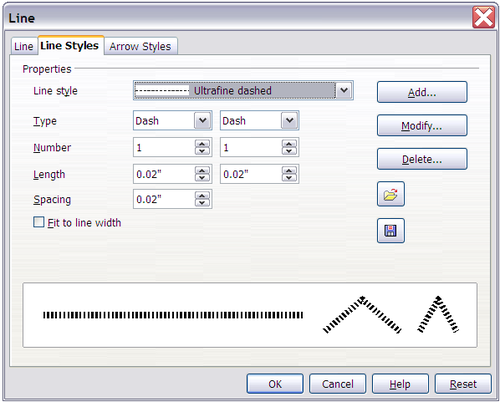
In the Line dialog, click on the Line Styles tab (see Figure 8). From here you can customize the line styles or create your own (click on the Add button to create your own). You can change the length of the dashes, the space between them, and other attributes.
Use the Load Line Style ![]() and Save Line Style
and Save Line Style ![]() buttons to save a new definition or read one from disk (file extension .sod).
buttons to save a new definition or read one from disk (file extension .sod).
Customizing arrow styles
You can also create your own arrowheads to create some interesting effects, such as:
The first step is to draw a curve with the shape you want for the arrowhead.

Figure 9: To create your own arrowhead you must first draw a curve.
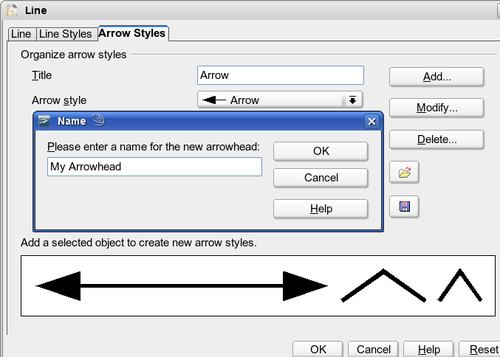
Select the curve, open the Line dialog, and go to the Arrow Styles tab. Click on Add, enter a name for the arrow style and click OK.
| The part of the shape which should point in the direction of the line must be drawn facing upwards. In Figure 9 the top of the shape will point towards the “outside” of the line. |
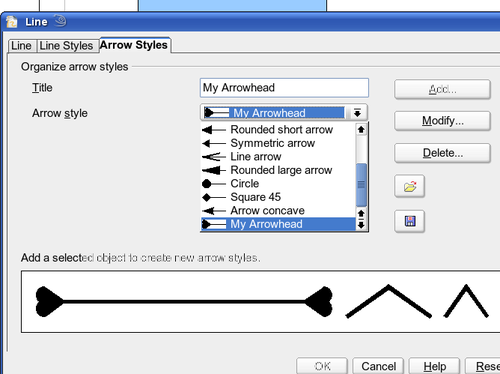
Now you can access the new style from the Arrow style list (Figure 11) or the Arrowheads menu (Figure 6).
| Content on this page is licensed under the Creative Common Attribution 3.0 license (CC-BY). |
