Cool effects
- Positioning objects with Zoom
- Positioning objects with snap functions
- Snap to grid
- Snap to snap objects
- Other snap functions
- Positioning objects with helper lines
- Drawing to scale
- Splitting complex drawings on multiple layers
- Example: house plan and furniture
- Multi-page document
- Using page backgrounds
- Color palette
- Using the color picker dialog
- Cool effects
Duplication
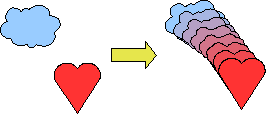
Duplication makes copies of an object while applying a set of changes (such as color or rotation) to the duplicates.
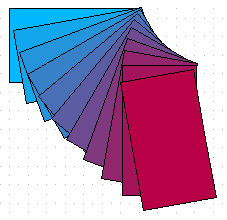
Figure 28: Duplication example.
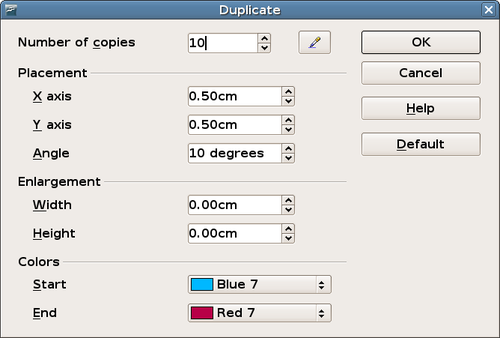
To start duplication, click on an object or group and choose Edit > Duplicate. The Duplicate dialog appears:
Choose the number of copies, their separation (placement), rotation, and so on. The choices above applied to a blue rectangle produce the following result shown in Figure 28 above.
Here is another example, showing the result of a different set of choices:
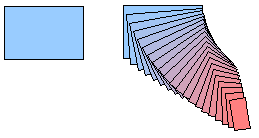
Figure 30. The duplication tool in action.
Cross-fading
Cross-fading transforms one shape into another. The result is a new group of objects including the two end points and the intermediate steps.
To do a cross-fade, select two objects.

Figure 31: The two objects selected for cross fading.
Then choose Edit > Cross-fading.
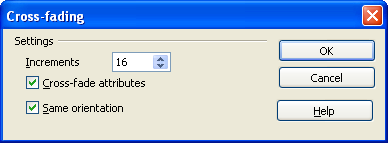
Figure 32: Cross-fading dialog.
On the dialog choose the number of increments (transition steps). You probably want to have Cross-fade attributes and Same orientation both checked. The end result is shown below.
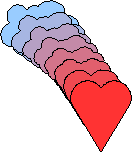
Figure 33: Cross-fading with 6 steps.
Which object goes in front?
How do I tell OpenOffice.org I want ![]() and not
and not ![]() ? If you want
? If you want ![]() then select
then select ![]() (the object we want in front), right-click and choose Arrange > Bring to Front (or Ctrl+Shift++). Or select
(the object we want in front), right-click and choose Arrange > Bring to Front (or Ctrl+Shift++). Or select ![]() (the object we want behind), right-click and choose Arrange > Send to Back (or Ctrl+Shift+-).
(the object we want behind), right-click and choose Arrange > Send to Back (or Ctrl+Shift+-).
| Content on this page is licensed under the Creative Common Attribution 3.0 license (CC-BY). |
