Creating a template
- Applying styles
- Modifying styles
- Creating new (custom) styles
- Copying and moving styles
- Deleting styles
- Using a template to create a document
- Creating a template
- Editing a template
- Adding templates using Extension Manager
- Setting a default template
- Associating a document with a different template
- Organizing templates
- Examples of style use
You can create your own templates in two ways: from a document, and using a wizard.
Creating a template from a document
To create a template from a document:
- Open a new or existing document of the type you want to make into a template (text document, spreadsheet, drawing, presentation).
- Add the content and styles that you want.
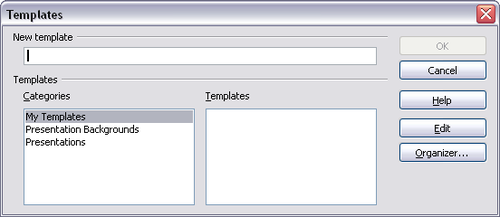
- From the main menu, choose File > Templates > Save. The Templates dialog opens.
- In the New template field, type a name for the new template.
- In the Categories list, click the category to which you want to assign the template. The category you choose has no effect on the template itself; it is simply the folder in which you save the template. Choosing an appropriate category makes it easier to find the template when you want to use it. For example, you might save Impress templates under the Presentations category. To learn more about template folders, see Organizing templates.
- Click OK to save the new template.
Any settings that can be added to or modified in a document can be saved in a template. For example, below are some of the settings (although not a full list) that can be included in a Writer document and then saved as a template for later use:
- Printer settings: which printer, single sided / double sided, and paper size, and so on
- Styles to be used, including character, page, frame, numbering and paragraph styles
- Format and settings regarding indexes, tables, bibliographies, table of contents
Templates can also contain predefined text, saving you from having to type it every time you create a new document. For example, a letter template may contain your name, address and salutation.
You can also save menu and toolbar customizations in templates; see Chapter 14 (Customizing OpenOffice.org) for more information.
Creating a template using a wizard
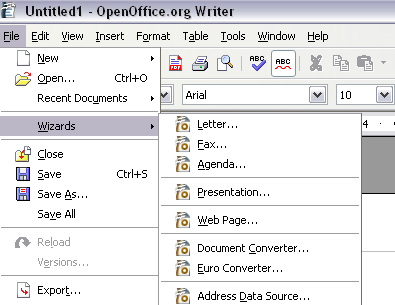
You can use wizards to create templates for letters, faxes, agendas, presentations, and Web pages.
For example, the Fax Wizard steps you through the following choices:
- Type of fax (business or personal)
- Document elements like the date, subject line (business fax), salutation, and complementary close
- Options for sender and recipient information (business fax)
- Text to include in the footer (business fax)
To create a template using a wizard:
- From the main menu, choose File > Wizards > [type of template required].
- Follow the instructions on the pages of the wizard. This process is slightly different for each type of template, but the format is very similar.
- In the last section of the wizard, you can specify the name and location for saving the template. The default location is your user templates directory, but you can choose a different location if you prefer.
- Finally, you have the option of creating a new document from your template immediately, or manually changing the template. For future documents, you can re-use the template created by the wizard, just as you would use any other template.
| Content on this page is licensed under the Creative Common Attribution 3.0 license (CC-BY). |

