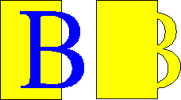
Merge, subtract or intersect shapes
The functions Merge, Subtract, and Intersect can be reached, after you have selected more than one object, in the Modify > Shapes menu or though the (group’s) right-clickmenu under the heading Shapes.
Merge
When you merge objects, the new object covers the entire surface of the original objects (it is the union of the objects). In the same way as combining, the fill of the merged object is determined by the fill of the object furthest in the background. Other properties are not taken over into the new object.
Subtract
When you subtract, the upper object is subtracted from the lower object.
Intersect
When you intersect two objects, you get the area covered by both objects.
| How do I move an object so it is further back or closer to the front? See Aids for positioning objects. |
Practical example
The following example shows how you can use the shape merge functions to create a complex shape, namely a knife with a wooden handle.
- Draw an ellipse and then a rectangle overlapping half of its width.
- Select both shapes, right-click, and choose Shapes > Subtract from the pop-up menu. The result should resemble the shape at right:
- Draw another rectangle and put it over the top half of the ellipse. Then subtract again.
- Draw a small ellipse covering just the lower right corner and subtract again.
- The knife blade is now complete. To make the handle, draw a rectangle and an ellipse as shown.
- Merge the shapes together.
- Group this image with the previous one.


| Content on this page is licensed under the Creative Common Attribution 3.0 license (CC-BY). |


