Difference between revisions of "Documentation/OOoAuthors User Manual/Draw Guide/Pictures and text"
From Apache OpenOffice Wiki
(New page: {{DISPLAYTITLE:Pictures and text}} {{Documentation/DrawAdvancedTOC |ShowPrevNext=block |PrevPage=Documentation/OOoAuthors User Manual/Draw Guide/Text frames and callouts |NextPage=Document...) |
|||
| Line 7: | Line 7: | ||
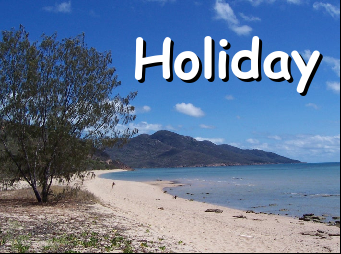
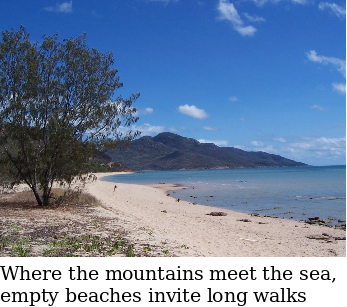
Pictures also possess a text element. To format this text proceed in exactly the same way as a normal rectangle. You can use this text element to place lettering over the picture or to give the picture a caption. Usually you will produce text as a separate object and then group it with the picture because you have more flexibility in what you can do with the text. Here are two examples showing what is technically possible with text elements. The construction of each is carried out using a format style. | Pictures also possess a text element. To format this text proceed in exactly the same way as a normal rectangle. You can use this text element to place lettering over the picture or to give the picture a caption. Usually you will produce text as a separate object and then group it with the picture because you have more flexibility in what you can do with the text. Here are two examples showing what is technically possible with text elements. The construction of each is carried out using a format style. | ||
| − | + | {| border="1" | |
| − | {| | + | | [[Image:DG10p19a.png]] |
| − | | [[Image:]] | + | |
| tab: ''Font'', “Comic Sans MS“, Size 48pt | | tab: ''Font'', “Comic Sans MS“, Size 48pt | ||
| Line 19: | Line 18: | ||
|- | |- | ||
| − | | | + | | [[Image:DG10p19b.png]] |
| tab: ''Font'' “Albany“, Size 12pt | | tab: ''Font'' “Albany“, Size 12pt | ||
Revision as of 07:49, 13 April 2008
Pictures also possess a text element. To format this text proceed in exactly the same way as a normal rectangle. You can use this text element to place lettering over the picture or to give the picture a caption. Usually you will produce text as a separate object and then group it with the picture because you have more flexibility in what you can do with the text. Here are two examples showing what is technically possible with text elements. The construction of each is carried out using a format style.
If you store the picture using File > Export the text will be exported along with the graphic. If you use the context menu, Save as graphic, then the text is not exported.
| Content on this page is licensed under the Creative Common Attribution 3.0 license (CC-BY). |

