Difference between revisions of "Documentation/OOoAuthors User Manual/Draw Guide/Drawing Bézier curves"
From Apache OpenOffice Wiki
(New page: {{DISPLAYTITLE:Drawing Bézier curves}} {{Documentation/DrawAdvancedTOC |ShowPrevNext=block |PrevPage=Documentation/OOoAuthors User Manual/Draw Guide/Guide to Bézier curves |NextPage=Docu...) |
(→Direct drawing of a Bézier curve) |
||
| Line 8: | Line 8: | ||
{| | {| | ||
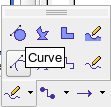
| − | | [[Image:]] | + | | [[Image:DG10-33a.png]] |
| Open the ''Curve'' toolbar by clicking on the small black triangle of the [[Image:]] symbol on the ''Draw'' toolbar. Click on the Curve icon [[Image:]]. The mouse cursor changes to [[Image:]]. | | Open the ''Curve'' toolbar by clicking on the small black triangle of the [[Image:]] symbol on the ''Draw'' toolbar. Click on the Curve icon [[Image:]]. The mouse cursor changes to [[Image:]]. | ||
|- | |- | ||
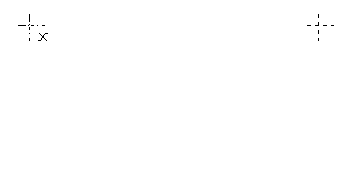
| − | | [[Image:]] | + | | [[Image:DG10-33b.png]] |
| Click on the start point of the curve and keep the mouse button pressed (start and end points are shown here in the figures as snap points). | | Click on the start point of the curve and keep the mouse button pressed (start and end points are shown here in the figures as snap points). | ||
|- | |- | ||
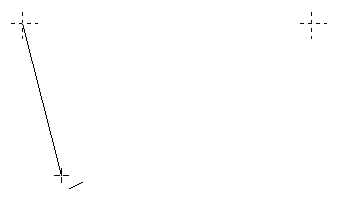
| − | | [[Image:]] | + | | [[Image:DG10-33c.png]] |
| Drag the mouse to approximately the position of your first control point. It does not matter if this is not exactly right as you can move the control point location later. If you hold the ''Shift'' key down while dragging, the control point will lie on a 45 degree grid. | | Drag the mouse to approximately the position of your first control point. It does not matter if this is not exactly right as you can move the control point location later. If you hold the ''Shift'' key down while dragging, the control point will lie on a 45 degree grid. | ||
|- | |- | ||
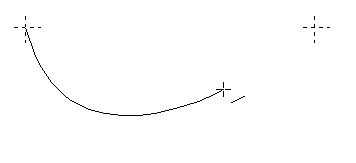
| − | | [[Image:]] | + | | [[Image:DG10-33d.png]] |
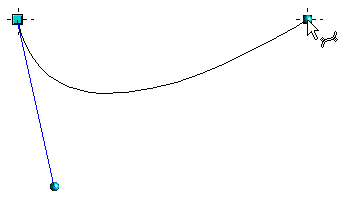
| Release the mouse button and move the mouse to the position of the end point of the curve. You can see that the line of the curve follows the movement of the mouse. Double-click at the end position. | | Release the mouse button and move the mouse to the position of the end point of the curve. You can see that the line of the curve follows the movement of the mouse. Double-click at the end position. | ||
|- | |- | ||
| − | | [[Image:]] | + | | [[Image:DG10-33e.png]] |
| Turn on point mode with the [[Image:]] icon from the ''Draw'' toolbar. | | Turn on point mode with the [[Image:]] icon from the ''Draw'' toolbar. | ||
| Line 30: | Line 30: | ||
|- | |- | ||
| − | | [[Image:]] | + | | [[Image:DG10-33f.png]] |
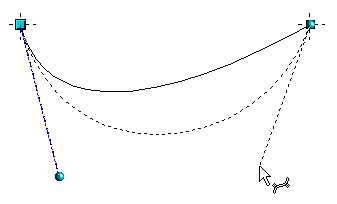
| If necessary, now you can drag the control point to its correct position. | | If necessary, now you can drag the control point to its correct position. | ||
|} | |} | ||
| + | |||
== Drawing a succession of Bézier curves == | == Drawing a succession of Bézier curves == | ||
Several lines or Bézier curves can be linked together. The single parts are referred to as segments. Technically such a succession of Bézier curves and lines is known as a ''path''. | Several lines or Bézier curves can be linked together. The single parts are referred to as segments. Technically such a succession of Bézier curves and lines is known as a ''path''. | ||
Revision as of 10:20, 13 April 2008
Direct drawing of a Bézier curve
Drawing a succession of Bézier curves
Several lines or Bézier curves can be linked together. The single parts are referred to as segments. Technically such a succession of Bézier curves and lines is known as a path.
Begin the drawing as with a simple Bézier curve. At the end position of the first segment, end not with a double-click but rather with one of the following methods:
- Click on the end point of the first segment but do not keep the mouse button pressed. In this way you produce a curve point which is both a control point for the first segment and a control point for the second segment. This control point lies however on the actual curve point and so does not influence the direction of the following curve segment. Move the mouse to the end position of the second segment. This segment appears to be a straight line but is in fact a Bézier curve. Either double-click to finish the curve or repeat the above procedure to add successive segments.
or
- Go back and click once on the end point of the first segment and keep the mouse button pressed. Now you can, as at the start but now for the second segment, place the control point. Release the mouse button at the position of the control point and move the mouse to the end position of the second segment. The curve follows the line of movement of the mouse.
You can either end the drawing here with a double-click or continue and link in further segments.
To generate a closed curve, select the curve and click on the Close Bézier icon [[Image:]] on the Edit Points toolbar, or from the context menu select the option Close object.
| Content on this page is licensed under the Creative Common Attribution 3.0 license (CC-BY). |
