Printing, Exporting, and E-mailing
- Chapter 6 Printing, Exporting, and E-mailing
This is Chapter 6 of the OpenOffice.org 3 Calc Guide, produced by the ODFAuthors group.
A PDF of this chapter is available from this wiki page.
Quick printing
Click the Print File Directly icon ![]() to send the entire document to the default printer defined for your computer.
to send the entire document to the default printer defined for your computer.
Controlling printing
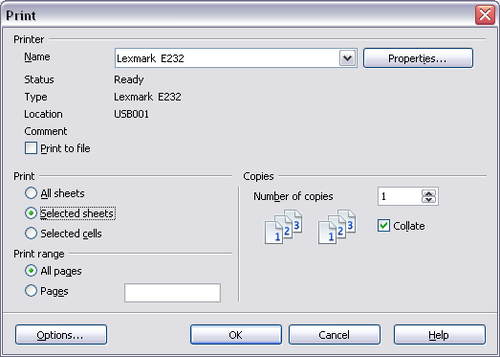
For more control over printing, use File > Print.
On the Print dialog, you can choose:
- Which printer to use (if more than one are installed on your system) and the properties of the printer—for example, page orientation (portrait or landscape), which paper tray to use, and what paper size to print on. The properties available depend on the selected printer; consult the printer’s documentation for details.
- What sheets and pages to print, how many copies to print, and in what order to print them. Use dashes to specify page ranges and commas or semicolons to separate ranges; for example: 1, 5, 11–14, 34–40. Selection refers to the highlighted part of a page or pages.
Printer options
You can set printer options for the current document only or for all spreadsheets.
- To select options for the current document, click the Options button on the bottom left of the Print dialog.
- To set print options permanently, go to Tools > Options > OpenOffice.org Calc > Print. The dialogs for both are very similar.
Selecting sheets to print
You can select one or more sheets for printing. This can be useful if you have a large spreadsheet with multiple sheets and only want to print certain sheets. For example, an accountant might record costs over time with one sheet for each month. To print the November and December sheets, follow this procedure.
- Go to the November sheet. Hold down the Control key and click on the tab of the December sheet.
- If you wish to print all of the sheets, go to File > Print and click the Options button.
- Deselect Print only selected sheets. This affects the print preview, export, and printing of your spreadsheet.Click OK.
| The Options button is different from the Properties button. Properties deals with the settings of the printer, whereas Options deals with OOo’s settings. |
Selecting the page order, details, and scale
To select the page order, details, and scale to be printed:
- Choose Format > Page from the main menu.
- Choose the Sheet tab.
- After making your selections, click OK.
Page Order
You can set the order in which pages print. This is especially useful in a large document; for example, controlling the print order can save time if you have to collate the document a certain way.
Where a sheet prints to more than one page of paper, it can be printed either by column, where the first column of pages prints, and then the second column and so on, or by row as shown in the graphic on the top right of the page order dialog above.
You can specify which details to print. Those details include:
- Row and column headers
- Sheet grid—prints the borders of the cells as a grid
- Comments—prints the comments defined in your spreadsheet on a separate page, along with the corresponding cell reference
- Objects and graphics
- Charts
- Drawing objects
- Formulas—prints the formulas contained in the cells, instead of the results
- Zero Values—prints cells with a zero value
Scale
Use the scale features to control the number of pages the data will print on. This can be useful if a large amount of data needs to be printed more compactly or, if the reader has poor eyesight, text can be enlarged when it prints.
- Reduce/Enlarge printout — scales the data in the printout either larger or smaller. For example if a sheet would normally print out as four pages (two high and two wide), a scaling of 50% would print as one page (both width and height are halved).
- Fit print range(s) on number of pages — defines exactly how many pages the printout will take up. This option will only reduce a printout, it will not enlarge it. To enlarge a printout, the reduce/enlarge option must be used.
- Fit print range(s) to width/height — defines how high and wide the printout will be, in pages.
| Content on this page is licensed under the Creative Common Attribution 3.0 license (CC-BY). |


