Lines, arrows, and rectangles
Drawing a straight line
We begin with the drawing of the simplest element – a straight line.
Click on the Line icon ![]() on the Drawing toolbar and place the mouse pointer at the point where you want to start the line (see Figure 3). Drag the mouse while keeping the mouse button pressed. Release the mouse button at the point where you want to end the line.
on the Drawing toolbar and place the mouse pointer at the point where you want to start the line (see Figure 3). Drag the mouse while keeping the mouse button pressed. Release the mouse button at the point where you want to end the line.
A blue or green selection handle appears at each end of the line, showing that this is the currently selected object. The colors depend on the standard selection mode – green with a normal selection and blue if you are in the point edit mode (this effect is easily apparent if on the Options toolbar both Simple Handles and Large Handles are switched on.
Hold down the Shift key while you draw a line to restrict the angle of the line to a multiple of 45 degrees (0, 45, 90, 135 and so on).
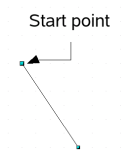
Figure 3: Drawing a straight line.
Keep the Ctrl key pressed while drawing a line to have the end of the line snap to the nearest grid point.
The spacing (resolution) of the grid points can be adjusted under Tools > Options > OpenOffice.org-Draw > Grid (see also Chapter 8).
Hold down the Alt key while drawing a line results in the line extending outwards symmetrically from the start point (the line will extend out equally each side of the starting point). This lets you draw lines by starting from the middle of the line.
The line just drawn has all the standard attributes (such as color and line style). To change any of these line properties, select the line by clicking on it, then right-click and select Line.
While you are working with this line, look at the information field on the status bar. A description of the current activity or status of selection is shown when you are working with an element or elements; see Figure 4 for two examples.
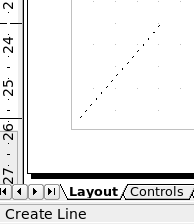
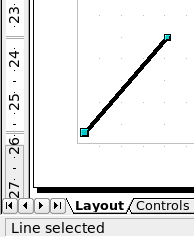
Figure 4: The information area in the status bar.
Drawing an arrow
Arrows are drawn like lines. Draw classifies arrows as a subgroup of lines: Lines with arrowheads. They are shown in the information field on the status bar only as lines. Click on the ![]() icon to draw an arrow.
icon to draw an arrow.
Drawing lines and arrows
Click on the small black triangle on the button Lines and Arrows ![]() to open a floating toolbar with 10 tools for drawing lines and arrows (Figure 5). Alternatively you can click directly on the symbol to repeat the last used command chosen from this toolbar. In both cases the last used command will be stored on the toolbar to make it quicker to call it up again.
to open a floating toolbar with 10 tools for drawing lines and arrows (Figure 5). Alternatively you can click directly on the symbol to repeat the last used command chosen from this toolbar. In both cases the last used command will be stored on the toolbar to make it quicker to call it up again.
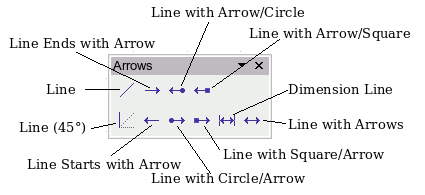
Figure 5: (Lines and) Arrows toolbar.
Drawing a rectangle or square
Drawing a rectangle is similar to drawing a straight line, except that you click on the rectangle icon ![]() on the Drawing toolbar, and the (imaginary) line drawn by the mouse corresponds to a diagonal of the rectangle. In addition you will see the outline of the future rectangle change in shape as you drag the mouse around. The outline is shown as a dashed line until you release the mouse button, when the rectangle is drawn.
on the Drawing toolbar, and the (imaginary) line drawn by the mouse corresponds to a diagonal of the rectangle. In addition you will see the outline of the future rectangle change in shape as you drag the mouse around. The outline is shown as a dashed line until you release the mouse button, when the rectangle is drawn.
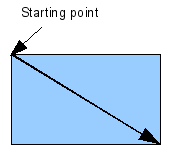
Figure 6: Drawing a rectangle.
Draw considers squares to be rectangles with equal length sides. Hold down the Shift key to draw a square. Hold down the Alt key while dragging with the mouse to create a rectangle with its center (rather than a corner) at the start point.
| Content on this page is licensed under the Creative Common Attribution 3.0 license (CC-BY). |