Documentation/OOoAuthors User Manual/Impress Guide/Formatting text
| [[{{{PrevPage}}}|< Previous Page
]] |
[[{{{NextPage}}}|Next Page
>]] |
Formatting text
Formatting text can give a presentation a consistent look and a dynamic feel. The appropriate use of formatting can even enhance the audience's understanding of your message by holding their interest.
Whenever you enter text, either in an AutoLayout text box or in a normal text box, it already comes with an underlying style. Generally this style is the outline level of the point where the text was entered for AutoLayout text boxes or the Default Graphic style for text boxes. Sometimes, as seen also in the Pasting text section, it is very useful to re-apply the baseline style to a selection of text, thus eliminating any manual formatting applied to it (particularly if you made a mistake and you do not know how to undo it). On these occasions, select the manually formatted text, and then select Format > Default formatting from the menu bar.
Using styles to format text
This chapter describes ways to apply manual formatting, but you are encouraged to use styles to really get the best out of Impress. The good news is that all the information given here can be immediately reused for applying styles. Chapter 2 describes how to use styles efficiently and the difference between the presentation and graphic styles available in Impress.
Modifying a style
In Impress there are two categories of styles: presentation styles and graphics styles. When inserting text in an AutoLayout area, the presentation styles become available, while when inserting text in a text box or a graphic object it is possible to apply the graphic styles.
It is possible to create new graphics styles, but not the presentation styles which are fixed and can only be modified.
To modify a style, follow these steps:
- Open the Styles and Formatting window by pressing F11 or selecting Format > Styles and Formatting from the menu bar.
- Select the style category by clicking on either the Presentation Styles icon or the Graphic Styles icon at the top of the Style and Formatting window (see ).
- Right-click on the style to be modified and select Modify from the pop-up menu.
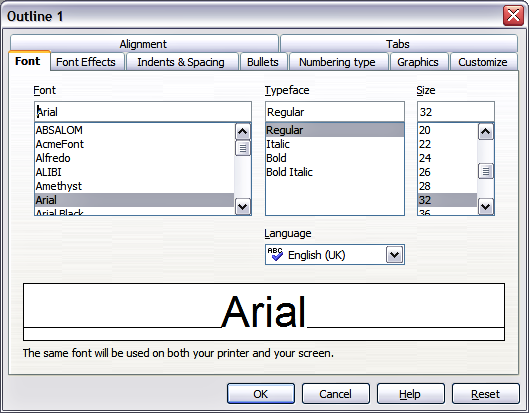
If you have selected a presentation style, this dialog is shown:
The dialog for making modifications to a graphics style is shown below.
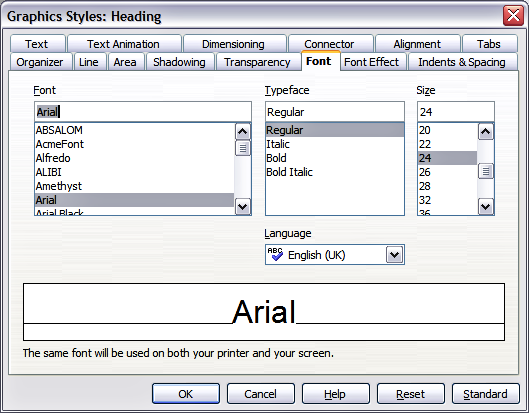
The Graphics Style modification dialog.
The Presentation Style dialog shares five pages with the Graphics Style dialog; these are the ones that determine the formatting of the text.
There is no difference between the parameters that characterize a style and the attributes given manually to portions of text: in fact the same dialogs are used in both cases. Therefore once you master the formatting of text, you will know how to create and modify a style. In particular:
- For the Font page of a style refer to Formatting characters.
- For the Font Effects page of a style refer to Formatting characters.
- For the Indents and Spacing page of a style refer to Formatting paragraphs.
- For the Alignment page of a style refer to Formatting paragraphs.
- For the Tabs page of a style refer to Formatting paragraphs.
The other tabs of the Presentation Style dialog are all related to bullets and numbering and are described in Creating bulleted and numbered lists.
For additional details on the other tabs in the Graphics Style dialog, please refer to Chapter 6 (Formatting Graphic Objects).
Note: When Asian typography is activated (Tools > Options > Language Settings > Languages), the dialogs above contain an additional page to set some high-level options for Asian typography, the Fonts page contains additional information and the Alignment page is slightly different.
Selecting text
Text must be selected before it can be formatted manually.
- To format all the text in a text box, click once on the text, then click once on the border of the text box. Only the green resizing handles are displayed. Now any formatting changes will apply to all the text in the text box.
- To format only part of the text, click once on the text, then select the text to be formatted by clicking and dragging (highlighting) over it. You can also use keyboard combinations to select text: move the cursor where you want to begin your selection, press Shift and then use the arrow buttons to extend your selection. Formatting changes will apply only to the selected text.
Tip: Pressing the Control key along with the Shift key while creating a selection is useful to speed up the process. This combination highlights the text word by word instead of character by character. To speed up the selection even further, you can combine the Shift key with the Home key or the End key to extend the selection up to the start or end of the line in which the cursor is positioned, respectively.
Formatting characters
To view the character formatting options, select Format > Character or click the Character button ![]() on the Text Formatting toolbar. (If a toolbar with the text icon is not visible, choose View > Toolbars > Text Formatting.) The Character dialog appears.
on the Text Formatting toolbar. (If a toolbar with the text icon is not visible, choose View > Toolbars > Text Formatting.) The Character dialog appears.
Font page
Use the Font page to select the desired font type, its base attributes (Italic, Bold, etc.) as well as the size. A sample of the font is displayed in the lower part of the dialog. You can also specify the language of this style.
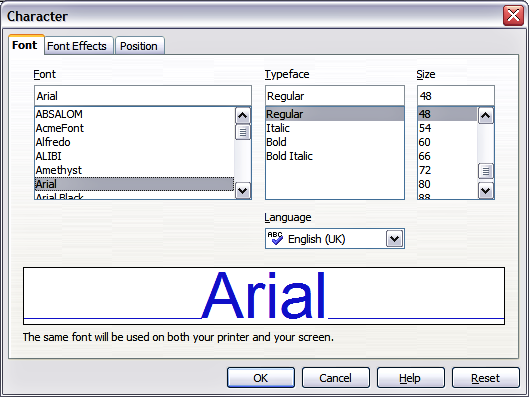
The Font page, to set the basic font attributes.
Tip: When writing a presentation in multiple languages, you can make the best of the language setting by creating two styles that only differ in the language but are otherwise the same. This allows you to check the spelling of all of the contents without affecting the appearance.
This page is available when creating or modifying a presentation style or a graphics style.
If Asian Typography has been enabled, the Font page looks like this:
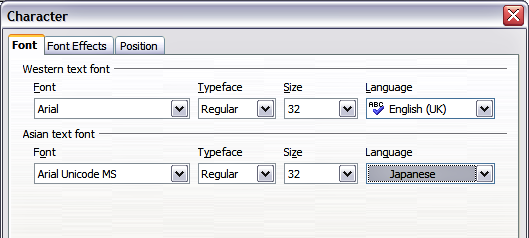
The Font page when Asian typography is enabled.
The page is divided into three parts. The top and bottom parts have the same functionality as described above, while in the middle part you can specify the Asian text font and its attributes.
Font Effects page
Use the Font Effects page to apply special effects to the text, such as underlining, color, shadow and so on. As for the Font page, a sample of the text is displayed in the lower part of the dialog allowing a quick visual check of the effects applied.
This page is available when creating or modifying a presentation style or a graphics style.
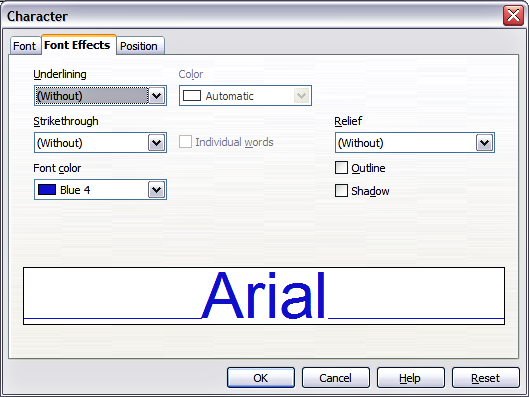
Advanced options for the character can be set in the Font Effects page.
Position page
The Position page has advanced options to customize text. This page is not available when creating or modifying a presentation style or a graphics style.
Use this page to set the text position relative to the baseline when you need to insert subscripts or superscripts.
To create a superscript or a subscript do the following:
- Select Superscript or subscript as applicable.
- Specify the amount by which the text should be raised (superscripts) or lowered (subscripts).
- Specify the dimension of the character relative to the baseline character size (in percentage).
The amount by which the text is raised or lowered can be set to automatic by selecting the Automatic checkbox.
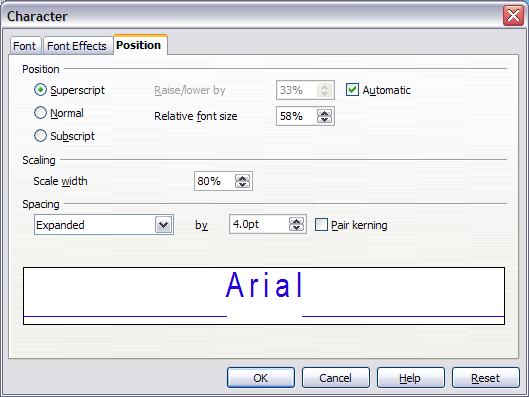
Dialog to set the character position attributes.
Two more position attributes can be set on this page:
- The (width) scaling of the text, which specifies the percentage of the font width by which to compress or expand the individual characters of the selected text.
- The spacing between the characters of the font, which can be defined in number of points. Selecting the Pair kerning checkbox causes OOo to automatically adjust the spacing between certain pairs of characters to visually improve the appearance. For example, when writing a V followed by an A (VA) the spacing between the two letters is reduced (strong kerning) as can be easily seen when compared with, say, VS which is not a kerning pair.
Formatting paragraphs
To view the paragraph formatting options, select Format > Paragraph or click the Paragraph button ![]() on the Text Formatting toolbar. If a toolbar with the text icon is not visible, choose View > Toolbars > Text Formatting. The Paragraph dialog is shown.
on the Text Formatting toolbar. If a toolbar with the text icon is not visible, choose View > Toolbars > Text Formatting. The Paragraph dialog is shown.
This dialog contains three pages that are described in detail below. If Asian Typography has been activated, a page called Asian Typography is also displayed.
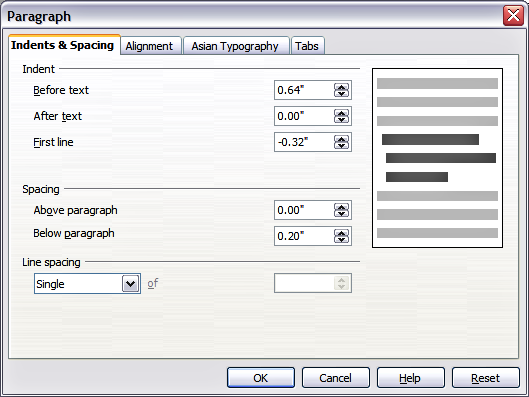
The paragraph formatting dialog.
Indents and Spacing page
The Indents and Spacing page has four sections:
- Indent: modifies the indentation of the text (before and after) as well as the indentation of the first line.
- Spacing: defines the space before and after each paragraph formatted with the style.
- Line spacing: determines the spacing between two lines formatted with the style. Note that selecting Proportional spacing requires specifying the percentage of a line to be used as spacing; 100% corresponds to a single line, 200% to a double line, 50% to half a line. If Leading is selected, specify the amount of line spacing in your default unit of measurement.
- Preview area: provides a visual representation of the settings before you apply them.
Tip: Setting the line spacing to less than 100% is a good method to cram a lot of text into a text box, however care must be taken as too small a value will make the text hard to read.
Tip: You can change the default unit of measurement, for example from inches to centimetres, from Tools > Options > OpenOffice.org Impress > General.
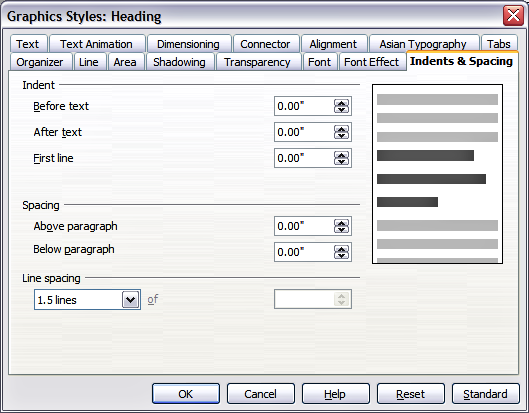
Indent and spacing settings for the selected paragraph or style.
The Indents and Spacing page is also available when creating or modifying a graphics style, or modifying a presentation style.
Alignment page
Use the Alignment page to determine the text alignment: Left, Right, Center, or Justified. A preview shows the effects of the changes. The same choices can be accessed from the Text Formatting toolbar. ![]()
This page is also available when creating or modifying a graphics style, or modifying a presentation style.
Tabs page
Use the Tabs page, shown in the style modification dialog below, to set tab stops. To delete one existing tab stop, select it in the list and click the Delete button. To delete all the tab stops, click the Delete All button. To create a new tab stop:
- Set the size of the tab stop in the edit box on the left.
- Select the type. If you set the type to Decimal. specify in the box below the character to be considered the decimal point.
- Select a fill character which will be drawn from the tab insertion point up to the tab stop. You can choose any character to act as fill character.
- Click the New button to apply the new tab stop.
This page is also available in the Format > Paragraph dialog, as seen in Figure 9.
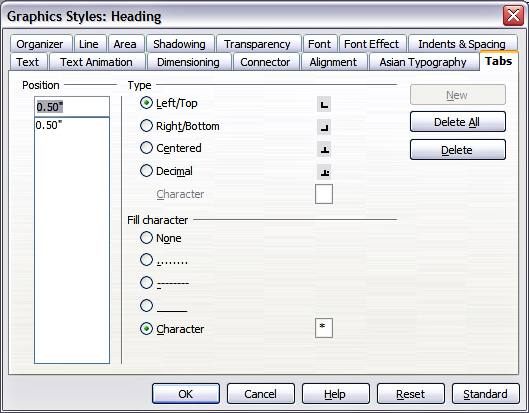
Dialog to set tab stops in a paragraph or style.
Asian Typography page
Use the Asian Typography page to set the following properties relative to line changes:
- Apply list of forbidden characters to the beginning and end of lines
- Allow hanging punctuation
- Apply spacing between Asian, Latin and Complex text
Their use is self-explanatory.
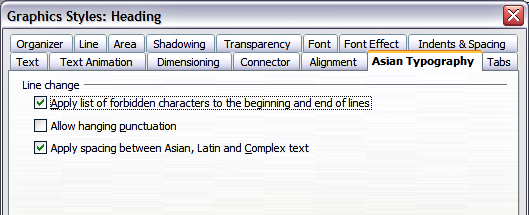
Asian Typography page options.
| Content on this page is licensed under the Creative Common Attribution 3.0 license (CC-BY). |
