Difference between revisions of "JavaEclipseTuto"
(→Creating the project) |
(→Eclipse and the plugin) |
||
| (31 intermediate revisions by 15 users not shown) | |||
| Line 1: | Line 1: | ||
=How to create a Java component with Eclipse= | =How to create a Java component with Eclipse= | ||
| − | == Introduction == | + | ==Introduction== |
| − | This paper is a tutorial to guide UNO newcomers | + | This paper is a tutorial to guide UNO newcomers through creating their first Java component. This tutorial will use Eclipse and its plugin for the OpenOffice.org development, and every step will be detailed. If you are an experienced UNO programmer, you can still follow this tutorial to have a better view of how to use the Eclipse plugin. |
| − | === UNO Components === | + | ===UNO Components=== |
| − | This section will explain some very basic things about UNO components. You | + | This section will explain some very basic things about UNO components. You can skip it if you already know it. First I will explain what a component is and its main parts. Afterwards, I will explain what is needed to create a UNO component to help you to fully understand the different tools and their use during the tutorial. |
====Components anatomy==== | ====Components anatomy==== | ||
| − | ''"A component is a system element offering a predefined service and able to communicate with other components"'' explains [http://fr.wikipedia.org/wiki/composant Wikipedia (Fr)] | + | ''"A component is a system element offering a predefined service and able to communicate with other components"'' explains [http://fr.wikipedia.org/wiki/composant Wikipedia (Fr)] (Even thought there is a definition on the English wikipedia article, I prefer the French one because of its completeness). In UNOs case a component will generally be delivered as a package containing a library (share library in C++ or jar in Java). For UNO, a component is made of two distinct parts: specifications and an implementation. |
| − | * '''Specification: '''definition in a common language of what the component should do. For UNO, this language is called UNO-IDL and is more or less similar to [http://en.wikipedia.org/wiki/Corba Corba] IDL. The documented part that will be provided as an API to use the component is the specification. Thus it should be complete and implementation independent. | + | *'''Specification: '''definition in a common language of what the component should do. For UNO, this language is called UNO-IDL and is more or less similar to [http://en.wikipedia.org/wiki/Corba Corba] IDL. The documented part that will be provided as an API to use the component is the specification. Thus, it should be complete and implementation independent. |
| − | * '''Implementation: '''is the code that will realize what is described in the component specifications. This programming language can either be C++, Java, Python or | + | *'''Implementation: '''is the code that will realize what is described in the component specifications. This programming language can either be C++, Java, Python or others. This is the internal part of the component and will not be accessible from another component. |
| − | In order UNO knows which implementation corresponds to which specification, the component will use registries. There are two of them: the first one describes all the component specifications ( | + | In order that UNO knows which implementation corresponds to which specification, the component will use registries. There are two of them: the first one describes all the component specifications (<tt>types.rdb</tt>) and the second translates the implementation into specifications (<tt>services.rdb</tt>) and is generated from the implementation. |
====Components creation process==== | ====Components creation process==== | ||
| − | + | The following diagram will help you better understand what should be done to get a component from its specification and sources. As shown by the diagram, the specifications are compiled and merged into one <tt>types.rdb</tt> registry. <tt>Class</tt> files are generated from that file to translate the specifications into a Java class definition file which is built with the implementation into a class using the <tt>java</tt> compiler. All the classes are delivered as a <tt>jar</tt> file with a specific manifest as we will see further in this tutorial. This doesn't make a usable OpenOffice.org: the <tt>types.rdb</tt> and <tt>jar</tt> file will have to be zipped into a <tt>.uno.pkg</tt> file described with another manifest. | |
[[Image:CompilationChain.png|center|UNO component build chain]] | [[Image:CompilationChain.png|center|UNO component build chain]] | ||
| − | As I will explain | + | As I will explain later, the Eclipse plugin will hide some of these operations, however you will need to know how they work to fully understand the build process and what we will do in the following steps. |
| − | |||
| − | |||
| − | + | ===Installing the development platform=== | |
| − | + | Now that you know what to do, we will install and configure the development tools. This is quite simple, but you can run into some problems if you do not read the following information carefully. I will now assume that you have none of the development tools. The minimum requirements for OpenOffice.org Eclipse integration are: | |
| − | *OpenOffice.org 2.0 | + | |
| − | * | + | *OpenOffice.org 2.0 |
| − | * | + | *OpenOffice.org SDK 2.0.4 |
| + | *Eclipse 3.2 | ||
| + | *Java 1.5 (the GNU Java does not work with the Eclipse integration) | ||
====OpenOffice.org==== | ====OpenOffice.org==== | ||
| − | First of all, you will need to have a working OpenOffice.org 2.0 and | + | First of all, you will need to have a working OpenOffice.org 2.0 and its Software Development Kit (SDK). The latest versions are available on the [http://download.openoffice.org/ OpenOffice.org download pages] for the most current platforms. The OpenOffice.org SDK version 2.0.4 is mandatory to use the plugin correctly. It includes a new tool used by the plugin: the <tt>uno-skeletonmaker</tt>. This tool will generate the implementation skeleton to help you to concentrate only on your code. |
| − | + | '''This tutorial assumes that you used the "Official" OpenOffice.org distribution''' from the project's website. Other distributions may not work with the Eclipse integration (see the trouble shooting section at the end of this page). | |
====Eclipse and the plugin==== | ====Eclipse and the plugin==== | ||
| − | To get Eclipse, just | + | To get Eclipse, just go to their download pages and download the latest Eclipse SDK. You will have Eclipse and its SDK. Of course, you might want to download only the binary runtime, but you will have to follow more links. Once you have Eclipse, unzip it on your computer and that's it: Eclipse has a Java plugin to help you program in Java. |
| − | Now we will install the OpenOffice.org development plugin for Eclipse using the Eclipse software update system. Select the | + | Now we will install the OpenOffice.org development plugin for Eclipse using the Eclipse software update system. '''Do not try to download an archive from somewhere. Eclipse will do it for you when you do the following steps.''' Select the '''Help > Install New Software ''' menu to get the window shown in the following illustration. |
| − | [[Image: | + | [[Image:Install.jpg|400px|center|"Install" window]] |
| − | |||
| − | http:// | + | Now click on the ''Add'' Button on the upper right corner and paste this ''http://drake79.users.sourceforge.net/ooeclipse/site/'' link into the ''Location'' field, you can name the plugin as you want e.g. ''OOoEclipse Plugin''. |
| − | + | Now you have to click the checkbox beside the plugin you want to install, click next and the wizard will guide you through the installation. | |
| − | + | Congratulations, you have installed the OpenOffice.org plugin successfully. Now you must configure it. The following steps will guide you through this task. Go to the Eclipse options via the '''Window > Preferences...''' menu. In the list on the left, select the '''OpenOffice.org plugin > SDK Configuration''' item to get a window like the one shown in the following illustration. | |
| − | + | [[Image:Sdkconfiguration.jpg|400px|center|SDK configuration window]] | |
| − | + | In this window you will have to configure the path to your OpenOffice.org and to its SDK. So, let us begin with the SDK path: click on the '''Add''' button next to the SDKs list. You will have a window like the one shown in following illustration. Browse to your OpenOffice.org 2.0 SDK and validate. Then you will have to do the same for the OpenOffice.org path using the other '''Add''' button. | |
| − | + | Note that a URE installation can be selected instead of a complete OpenOffice.org installation. Please refer to the Java URE application tutorial for more details on the plugin's URE support. | |
| − | + | '''If you are using Windows, please make sure that the path to the SDK does not contains any spaces. Spaces in the path can cause problems when you build your UNO projects.''' | |
| − | Now your OpenOffice.org plugin is ready to work | + | [[Image:PathToSDK.jpg|center|New SDK path window]] |
| + | |||
| + | Now your OpenOffice.org plugin is ready to work. You can begin to create your new component. If there was any problem during the plugin installation, please report it to the dev@api.openoffice.org [http://api.openoffice.org/servlets/ProjectMailingListList mailing-list]. | ||
==Creating a new component== | ==Creating a new component== | ||
| − | For the Eclipse plugin, | + | For the Eclipse plugin, a UNO component is a UNO project. This tutorial will explain how to easily create a new UNO component using the Eclipse plugin. We will now assume that you have very simple needs. The component that will be created is a "Hello world" service and its implementation. Creating a component that defines and implements more services is a bit more complex and requires advanced Java UNO knowledge. |
| + | |||
| − | + | '''Note: The plugin needs to open a connection to Open Office in order for it to obtain lists of components. The plugin will try to bootstrap OO if it is not running. If it fails, starting Open Office after running the wizard will not succeed. You will have to restart the wizard.''' | |
| − | + | There are several ways to create a UNO component project using the plugin: | |
| − | There are several ways to create a UNO project using the plugin: | + | |
| − | * | + | *The first one is the '''File > New > Project''' menu entry and choose the '''UNO > UNO-IDL Project''' item as shown by the following illustration. |
[[Image:NewUnoProjectsItems.png|center|New UNO-IDL project item]] | [[Image:NewUnoProjectsItems.png|center|New UNO-IDL project item]] | ||
| − | * | + | *The second one is the icon in the toolbar representing a blue folder with a star as shown by the following illustration. |
[[Image:NewUnoProjectIcon.png|center|New UNO-IDL project icon]] | [[Image:NewUnoProjectIcon.png|center|New UNO-IDL project icon]] | ||
| − | + | Then you only have to follow the wizard to create your UNO component project, its specification and a skeleton of the implementation. This wizard is composed of several pages: | |
| − | + | *The main configuration page to define the general project properties. | |
| + | *The implementation language configuration page. | ||
| + | *The service configuration page. | ||
| + | *The interface configuration page. | ||
| + | After all these steps you will have a running component... doing nothing. The following sections will describe the different wizard pages and where to place your code. | ||
| − | |||
| − | |||
| − | |||
| − | |||
| − | |||
| − | |||
| − | |||
| − | |||
| − | + | ===The project configuration page=== | |
| + | The first page in the project wizard is the only page containing fields that must be filled in. All the others have default values to help you through the component creation. In our case, we will cover all the pages in the wizard to explain them all and define some new methods and attributes in our component. | ||
| − | + | [[Image:NewUnoProject.jpg|center|New UNO-IDL project wizard page]] | |
| − | + | ||
| − | + | *'''Project name:''' is the component name, in our case, it will be "''Helloworld''" | |
| + | *'''Location:''' is the directory on your computer where the project will be created. You can change the default one by deselecting the '''Use default''' check box. The default location of each Eclipse project is a directory with your project name in the current Eclipse workspace. '''Please do not use spaces in this path on Windows. Spaces in the path can prevent your component from being built.''' | ||
| + | *'''Root package:''' is the name of the first module of your component. It is generally composed of two parts: the vendor name (here <tt>org.openoffice</tt>) and the project name (here <tt>helloworld</tt>). | ||
| + | *'''Used SDK:''' selects the OpenOffice.org SDK which will be used to develop the component. You generally will have only one SDK in the list, but you can add others in the preferences or by clicking on the '''Configure SDKs''' button. | ||
| + | *'''Used OOo:''' selects the version of OpenOffice.org to use to develop the component. Just as with the SDK, you will generally have only one entry in the list, but you can add others in the preferences or by clicking on the OOo Installations button. | ||
| + | *'''Programming language:''' selects the programming language for the component implementation. For the moment, there is only Java available, however C++ and python are planned. | ||
| − | + | ===The implementation language configuration page=== | |
| − | + | This page depends on the chosen language. For Java, the default values should be kept: they define which class is the main class of the component. The component's main class contains some code mapping the services to their implementation. | |
| − | + | ||
| − | + | ||
| − | + | ||
| − | + | ||
| − | |||
| − | + | ===The service configuration page=== | |
| − | + | [[Image:Eclipse_Service_Page.png|center|Service configuration page]] | |
| − | * ''' | + | *'''Module:''' corresponds to the UNO-IDL module where to add the interface. If the text field is left empty, the interface will be added in the root module of the component (filled in the project wizard). |
| − | * ''' | + | *'''Service name:''' is the service name. By keeping the default value, you will be able to define your own interface using the interface configuration page. Otherwise, you can reuse an existing interface. |
| − | * '''Published | + | *'''Published''': specifies if the interface is published or not. The published notion is translated into a keyword in UNO-IDL language. Declaring a UNO-IDL type as published means that it will not change in future releases. We will keep it unchecked because our component is really far from being a stable API. |
| − | + | ||
| − | + | ||
| − | + | ||
| − | + | ===The interface configuration page=== | |
| − | + | [[Image:NewInterfacePage.png|center|Interface configuration page]] | |
| − | + | *'''Module:''' corresponds to the UNO-IDL module where the interface is added. If the text field is left empty, the interface will be added in the root module of the component (filled in the project wizard). | |
| + | *'''Interface name:''' is the interface name. By convention, we generally name an interface beginning with an "X". In this tutorial, the interface will be named <tt>XHelloworld</tt>. | ||
| + | *'''Inherited interfaces:''' is a list of all the interfaces from which the one that is about to be created will inherit. This is one of the changes in UNO-IDL between OpenOffice.org 1.1.x and 2.0, and why the plugin does not support OpenOffice.org versions prior to 2.0. All the UNO-IDL interfaces are inheriting more or less directly from the <tt>com::sun::star::uno::XInterface</tt> type. As the <tt>XHelloworld</tt> interface is very easy, no super interface will be added. This will implicitly define <tt>XInterface</tt> as the only parent for the new interface. | ||
| + | **'''"?" column:''' specifies if the interface inheritance is mandatory or not. If the box is checked, the interface inheritance is optional and may not be implemented. | ||
| + | **'''"Add" and "Del" buttons:''' allows you to add an interface to the inherited ones or remove the selected interface. Iff a connection to OpenOffice (already running or bootstrapped by the plugin) was succesfully made, you will see: [[Image:UNO_Types_Selector.PNG|center|UNO Types Selector option sheet]]It may take up to a minute to appear depending on your machine. | ||
| + | *'''Members:''' is a list of all the methods and properties of the interface. See below for explanations about the members. In this tutorial, just create one <tt>string sayHello([in] boolean isBadBoy)</tt> method and a <tt>LadyName</tt> property. | ||
| + | *'''Published:''' specifies if the interface is published or not. The published notion is translated into a keyword in UNO-IDL language. Declaring a UNO-IDL type as published means that it will not change in future releases. We will keep it unchecked because our component is really far from being a stable API. | ||
| + | A UNO interface can contain two kind of members: methods and properties. When clicking on the '''Add''' button near the members' list, the following window will be shown. When double-clicking on a line in the members' list, you will edit the corresponding member through the same window. | ||
| − | + | When the window is opened to create a new member, you can choose whether the member will be a property or a method. The name and returned type fields are always present, but the lower part of the dialog is different for a method and a property. | |
| − | + | ||
| − | + | ||
| − | + | [[Image:Eclipse_Interface_Members_Dialog.png|center|Interface member creation dialog]] | |
| − | + | *'''The arguments list:''' defines the name, type and direction of the parameters of the method. Simply click on the cell to edit it. | |
| − | + | *'''Read-only and Bound check boxes:''' selecting these boxes sets the corresponding IDL flag on the property. | |
| − | + | ||
| − | + | ||
| − | + | ||
| − | + | ||
| − | The | + | |
| − | + | ||
| − | + | ||
| − | + | ||
| − | + | ||
| − | + | ||
| − | + | ||
| − | + | ||
| − | + | ||
| − | + | ||
| − | + | ||
| − | + | ||
| − | + | ||
| − | + | ||
| − | + | ||
| − | + | ||
| + | '''Tip:''' you can use ''<tt>''Ctrl+Space''</tt>'' to complete the type name in the '''Return type''' field and '''Type''' column. | ||
===Writing the implementation=== | ===Writing the implementation=== | ||
| − | + | After having completed the wizard, you need to write the component implementation. Hopefully a skeleton has been generated and opened. You need to complete the code where there are some TODOS. The generated project contains the following directories and files: | |
| + | *'''source:''' directory containing your Java implementation classes. | ||
| + | *'''build:''' directory containing all the generated temporary files, such as the results of the specification files (<tt>.idl</tt> files) compilation (<tt>.urd</tt> files) or the class files corresponding to the specifications (<tt>.class</tt> files). | ||
| + | *'''idl:''' directory containing the specifications of the component. | ||
| + | *'''types.rdb:''' generated UNO types registry from which the classes files will be generated. | ||
| + | *'''JRE and the jars:''' describe the classpath of the component. They are visible only in the Java package explorer. The OpenOffice.org jars are changed if the OpenOffice.org version associated to the project is changed. ''In a future version, they will be packed in a user library to take less space in the tree.'' | ||
| + | The generated skeleton already contains the methods for the implementation registration. The only things to modify are: | ||
| − | + | *Change the code of the setters and getters for the defined properties. | |
| − | + | *Change the code of the defined methods. | |
| + | The Eclipse integration even manages the libraries needed by your implementation. Let us imagine that we want to use the <tt>Fraction</tt> class from the Apache <tt>common-math</tt> jar. Download this jar from the Apache website, and import the <tt>common-math-1.1.jar</tt> file into your component project, for example in a <tt>lib</tt> directory. Add the jar to the project build path in the same way than in any other Eclipse Java project and use it: | ||
| − | + | <source lang="java"> | |
| + | // org.openoffice.helloworld.XHelloworld: | ||
| + | private String mLadyName = ""; | ||
| + | |||
| + | public String getLadyName() | ||
| + | { | ||
| + | return mLadyName; | ||
| + | } | ||
| − | + | public void setLadyName(String the_value) | |
| − | + | { | |
| − | + | mLadyName = the_value; | |
| − | + | } | |
| − | + | ||
| − | + | ||
| − | + | ||
| − | + | ||
| − | + | ||
| − | + | ||
| − | + | ||
| − | + | ||
| − | + | ||
| − | + | ||
| − | + | ||
| − | + | ||
| − | + | ||
| − | + | ||
| − | + | ||
| − | + | ||
| − | + | ||
| − | + | ||
| − | + | ||
| − | + | ||
| − | + | ||
| − | + | ||
| − | + | public String sayHello(boolean isBadBoy) | |
| − | + | { | |
| − | + | String hello = "Hello Mrs. " + getLadyName(); | |
| − | + | if (isBadBoy) { | |
| + | Fraction f = new Fraction(1, 3); | ||
| + | hello = "A third is " + f.doubleValue(); | ||
| + | } | ||
| + | return hello; | ||
} | } | ||
| − | + | </source> | |
| − | + | The above code shows you what could be an implementation of our component. Now, there is only to package it properly and test it. | |
| − | + | ||
| − | + | ||
| − | + | ||
| − | + | ||
| − | + | ||
| − | + | ||
| − | + | ||
| − | + | ||
| − | + | ||
| − | + | ||
| − | + | ||
| − | == | + | ==Packaging and testing the component== |
| − | + | Now we will show you how to export your component into an OpenOffice.org package. There is little to do apart from following these steps: | |
| + | *Select the '''File > Export''' menu. Then choose the '''UNO > OpenOffice.org''' package export type. | ||
| + | *The next page of the wizard asks for the UNO project to export (already selected), the directory where to export the package and the OpenOffice.org minimum compatibility version for the package. Depending of the selected OpenOffice.org version, the package will get a different name and a different structure. | ||
| + | *Click on the Finish button. The wizard will ask you whether to deploy to package or not and asks for the old package removal if needed. | ||
| + | Then we will suppose that the package is deployed on the OpenOffice.org installation and we will test it using the following <tt>OooBasic</tt> macro. | ||
| − | = | + | <source lang="oobas"> |
| − | + | Sub testHelloworld | |
| + | oHelloworld = createUnoService( "org.openoffice.helloworld.Helloworld" ) | ||
| + | oHelloworld.LadyName = "Robinson" | ||
| + | print oHelloworld.sayHello( false ) | ||
| + | print oHelloworld.sayHello( True ) | ||
| + | End Sub | ||
| + | </source> | ||
| − | + | This macro should open two message windows with ''"Hello Mrs. Robinson"'' and ''"A third is 0.3333333"''. Your first UNO component is now running, enjoy doing others. | |
| − | + | ||
| − | + | ||
| − | + | ||
| − | + | ||
| − | + | ||
| − | + | ||
| − | + | ||
| − | + | ||
| − | + | ||
| − | + | ||
| − | + | ||
| − | + | ||
| − | + | ||
| − | + | ||
| − | + | ||
| − | + | ||
| − | + | ||
| − | + | ||
| − | + | ||
| − | + | ||
| − | + | ||
| − | + | ||
| − | + | ||
| − | + | ||
| − | + | ||
| − | + | ||
| − | + | ||
| − | + | ||
| − | + | ||
| − | + | ||
| − | + | ||
| − | + | ||
| − | + | ||
| − | + | ||
| − | + | ||
| − | + | ||
| − | + | ||
| − | + | ||
| − | + | ||
| − | + | ||
| − | + | ||
| − | + | ||
| − | + | ||
| − | + | ||
| − | + | ||
| − | + | ||
| − | + | ||
| − | + | ||
| − | + | ||
| − | + | ||
| − | + | ||
| − | + | ||
| − | + | ||
| − | + | ||
| − | + | ||
| − | + | ||
| − | + | ||
| − | + | ||
| − | + | ||
| − | + | ||
| − | + | ||
| − | + | ||
| − | + | ||
| − | + | ||
| − | + | ||
| − | + | ||
| − | + | ||
| − | + | ||
| − | + | ||
| − | + | ||
| − | + | ||
| − | + | ||
| − | + | ||
| − | + | ||
| − | + | ||
| − | + | ||
| − | + | ||
| − | + | ||
| − | + | ||
| − | + | ||
| − | + | ||
| − | + | ||
| − | + | ||
| − | + | ||
| − | + | ||
| − | + | ||
| − | + | ||
| − | + | ||
| − | + | ||
| − | + | ||
| − | + | ||
| − | + | ||
| − | + | ||
==Going further== | ==Going further== | ||
| − | This chapter is only for those who enjoyed this tutorial and want to know more about the UNO component creation in Java or other languages. | + | This chapter is only for those who enjoyed this tutorial and want to know more about the UNO component creation in Java or other languages. The following is a list of useful links for any UNO developer: |
| − | + | *[http://api.openoffice.org/docs/DevelopersGuide/DevelopersGuide.xhtml OpenOffice.org developer's guide] is a huge source of documentation for any OpenOffice.org developer. You should probably have a look at chapters 3 and 4 for UNO component information. | |
| − | *[http://api.openoffice.org/docs/DevelopersGuide/DevelopersGuide.xhtml OpenOffice.org developer's guide] is a huge source of documentation for any OpenOffice.org developer. You should probably have a look at | + | |
*[http://api.openoffice.org/docs/java/ref/overview-summary.html OOo Java reference] is the UNO binding for Java reference. | *[http://api.openoffice.org/docs/java/ref/overview-summary.html OOo Java reference] is the UNO binding for Java reference. | ||
*[http://api.openoffice.org/docs/cpp/ref/names/index.html OOo C++ reference] is the UNO binding for C++ reference. | *[http://api.openoffice.org/docs/cpp/ref/names/index.html OOo C++ reference] is the UNO binding for C++ reference. | ||
| − | *[ | + | *[http://wiki.services.openoffice.org/ OOo Developer's Wiki] is the wiki for all the OpenOffice.org developers. It contains useful information even for people who are just starting out with UNO. |
| − | *http://udk.openoffice.org/common/man/draft/multinherit.html for further | + | *[http://udk.openoffice.org/common/man/draft/multinherit.html http://udk.openoffice.org/common/man/draft/multinherit.html] for further information on what changes have been made in UNO-IDL between OpenOffice.org 1.1.x and 2.0 |
| − | *[http:// | + | *[http://tools.openoffice.org/autodoc/HowToWriteDocumentation-Cpp.html Autodoc Java reference] is the reference for <tt>javadoc</tt> like comments in UNO-IDL files. |
| − | *[http://tools.openoffice.org/autodoc/HowToWriteDocumentation-Cpp.html Autodoc C++ documentation] is the reference for javadoc like comments in C++ components. | + | *[http://tools.openoffice.org/autodoc/HowToWriteDocumentation-Cpp.html Autodoc C++ documentation] is the reference for <tt>javadoc</tt> like comments in C++ components. |
| − | *[http://cedric.bosdonnat.free.fr/wordpress/?p=19 C++ application tutorial] explains how to create a C++ application based on the URE, that is a UNO C++ component that does not need OpenOffice.org. | + | *[http://cedric.bosdonnat.free.fr/wordpress/?p=19 URE C++ application tutorial] explains how to create a C++ application based on the URE, that is a UNO C++ component that does not need OpenOffice.org. |
| − | + | ||
| − | + | ||
| − | + | ||
| − | + | ||
| − | + | ||
| − | + | ||
| − | + | ||
| − | + | ||
| + | ==Trouble shooting== | ||
| + | * If you run into trouble it might be helpful to turn the log level to debug mode. This can be done inside Eclipse via Window > Preferences > OpenOffice.org Integration. The log file can be found in ''$YOURWORKSPACEPATH/.metadata/.log'' . | ||
| + | * If you run into trouble at deployment, make sure that no OpenOffice process is running | ||
| + | * If redeployment does not work, because the previously installed plugin can not be deleted, use <OpenOffice Installation>\program\unopkg to delete it manually | ||
| + | * If you plan to use the OpenOffice version that comes with your distribution try using the according SDK (in Ubuntu it is the package openoffice.org-dev). If there is no such package and you run into trouble not getting the skeletons and opening of an external editor you probably have to create a symbolic link to ''/usr/lib/libstlport_gcc.so'' from the official version of libstlport_gcc.so extracted from an official download of OOo. | ||
| + | * On Unix running ''setsdkenv_unix'' in your SDK directory might helpful as well. | ||
| − | |||
| − | [[Category: | + | [[Category:Eclipse]] |
[[Category:Tutorial]] | [[Category:Tutorial]] | ||
[[Category:Java]] | [[Category:Java]] | ||
[[Category:Uno]] | [[Category:Uno]] | ||
| + | [[Category:Build_System]] | ||
Latest revision as of 13:26, 19 September 2013
Contents
How to create a Java component with Eclipse
Introduction
This paper is a tutorial to guide UNO newcomers through creating their first Java component. This tutorial will use Eclipse and its plugin for the OpenOffice.org development, and every step will be detailed. If you are an experienced UNO programmer, you can still follow this tutorial to have a better view of how to use the Eclipse plugin.
UNO Components
This section will explain some very basic things about UNO components. You can skip it if you already know it. First I will explain what a component is and its main parts. Afterwards, I will explain what is needed to create a UNO component to help you to fully understand the different tools and their use during the tutorial.
Components anatomy
"A component is a system element offering a predefined service and able to communicate with other components" explains Wikipedia (Fr) (Even thought there is a definition on the English wikipedia article, I prefer the French one because of its completeness). In UNOs case a component will generally be delivered as a package containing a library (share library in C++ or jar in Java). For UNO, a component is made of two distinct parts: specifications and an implementation.
- Specification: definition in a common language of what the component should do. For UNO, this language is called UNO-IDL and is more or less similar to Corba IDL. The documented part that will be provided as an API to use the component is the specification. Thus, it should be complete and implementation independent.
- Implementation: is the code that will realize what is described in the component specifications. This programming language can either be C++, Java, Python or others. This is the internal part of the component and will not be accessible from another component.
In order that UNO knows which implementation corresponds to which specification, the component will use registries. There are two of them: the first one describes all the component specifications (types.rdb) and the second translates the implementation into specifications (services.rdb) and is generated from the implementation.
Components creation process
The following diagram will help you better understand what should be done to get a component from its specification and sources. As shown by the diagram, the specifications are compiled and merged into one types.rdb registry. Class files are generated from that file to translate the specifications into a Java class definition file which is built with the implementation into a class using the java compiler. All the classes are delivered as a jar file with a specific manifest as we will see further in this tutorial. This doesn't make a usable OpenOffice.org: the types.rdb and jar file will have to be zipped into a .uno.pkg file described with another manifest.

As I will explain later, the Eclipse plugin will hide some of these operations, however you will need to know how they work to fully understand the build process and what we will do in the following steps.
Installing the development platform
Now that you know what to do, we will install and configure the development tools. This is quite simple, but you can run into some problems if you do not read the following information carefully. I will now assume that you have none of the development tools. The minimum requirements for OpenOffice.org Eclipse integration are:
- OpenOffice.org 2.0
- OpenOffice.org SDK 2.0.4
- Eclipse 3.2
- Java 1.5 (the GNU Java does not work with the Eclipse integration)
OpenOffice.org
First of all, you will need to have a working OpenOffice.org 2.0 and its Software Development Kit (SDK). The latest versions are available on the OpenOffice.org download pages for the most current platforms. The OpenOffice.org SDK version 2.0.4 is mandatory to use the plugin correctly. It includes a new tool used by the plugin: the uno-skeletonmaker. This tool will generate the implementation skeleton to help you to concentrate only on your code.
This tutorial assumes that you used the "Official" OpenOffice.org distribution from the project's website. Other distributions may not work with the Eclipse integration (see the trouble shooting section at the end of this page).
Eclipse and the plugin
To get Eclipse, just go to their download pages and download the latest Eclipse SDK. You will have Eclipse and its SDK. Of course, you might want to download only the binary runtime, but you will have to follow more links. Once you have Eclipse, unzip it on your computer and that's it: Eclipse has a Java plugin to help you program in Java.
Now we will install the OpenOffice.org development plugin for Eclipse using the Eclipse software update system. Do not try to download an archive from somewhere. Eclipse will do it for you when you do the following steps. Select the Help > Install New Software menu to get the window shown in the following illustration.

Now click on the Add Button on the upper right corner and paste this http://drake79.users.sourceforge.net/ooeclipse/site/ link into the Location field, you can name the plugin as you want e.g. OOoEclipse Plugin.
Now you have to click the checkbox beside the plugin you want to install, click next and the wizard will guide you through the installation.
Congratulations, you have installed the OpenOffice.org plugin successfully. Now you must configure it. The following steps will guide you through this task. Go to the Eclipse options via the Window > Preferences... menu. In the list on the left, select the OpenOffice.org plugin > SDK Configuration item to get a window like the one shown in the following illustration.

In this window you will have to configure the path to your OpenOffice.org and to its SDK. So, let us begin with the SDK path: click on the Add button next to the SDKs list. You will have a window like the one shown in following illustration. Browse to your OpenOffice.org 2.0 SDK and validate. Then you will have to do the same for the OpenOffice.org path using the other Add button.
Note that a URE installation can be selected instead of a complete OpenOffice.org installation. Please refer to the Java URE application tutorial for more details on the plugin's URE support.
If you are using Windows, please make sure that the path to the SDK does not contains any spaces. Spaces in the path can cause problems when you build your UNO projects.

Now your OpenOffice.org plugin is ready to work. You can begin to create your new component. If there was any problem during the plugin installation, please report it to the dev@api.openoffice.org mailing-list.
Creating a new component
For the Eclipse plugin, a UNO component is a UNO project. This tutorial will explain how to easily create a new UNO component using the Eclipse plugin. We will now assume that you have very simple needs. The component that will be created is a "Hello world" service and its implementation. Creating a component that defines and implements more services is a bit more complex and requires advanced Java UNO knowledge.
Note: The plugin needs to open a connection to Open Office in order for it to obtain lists of components. The plugin will try to bootstrap OO if it is not running. If it fails, starting Open Office after running the wizard will not succeed. You will have to restart the wizard.
There are several ways to create a UNO component project using the plugin:
- The first one is the File > New > Project menu entry and choose the UNO > UNO-IDL Project item as shown by the following illustration.

- The second one is the icon in the toolbar representing a blue folder with a star as shown by the following illustration.
Then you only have to follow the wizard to create your UNO component project, its specification and a skeleton of the implementation. This wizard is composed of several pages:
- The main configuration page to define the general project properties.
- The implementation language configuration page.
- The service configuration page.
- The interface configuration page.
After all these steps you will have a running component... doing nothing. The following sections will describe the different wizard pages and where to place your code.
The project configuration page
The first page in the project wizard is the only page containing fields that must be filled in. All the others have default values to help you through the component creation. In our case, we will cover all the pages in the wizard to explain them all and define some new methods and attributes in our component.

- Project name: is the component name, in our case, it will be "Helloworld"
- Location: is the directory on your computer where the project will be created. You can change the default one by deselecting the Use default check box. The default location of each Eclipse project is a directory with your project name in the current Eclipse workspace. Please do not use spaces in this path on Windows. Spaces in the path can prevent your component from being built.
- Root package: is the name of the first module of your component. It is generally composed of two parts: the vendor name (here org.openoffice) and the project name (here helloworld).
- Used SDK: selects the OpenOffice.org SDK which will be used to develop the component. You generally will have only one SDK in the list, but you can add others in the preferences or by clicking on the Configure SDKs button.
- Used OOo: selects the version of OpenOffice.org to use to develop the component. Just as with the SDK, you will generally have only one entry in the list, but you can add others in the preferences or by clicking on the OOo Installations button.
- Programming language: selects the programming language for the component implementation. For the moment, there is only Java available, however C++ and python are planned.
The implementation language configuration page
This page depends on the chosen language. For Java, the default values should be kept: they define which class is the main class of the component. The component's main class contains some code mapping the services to their implementation.
The service configuration page

- Module: corresponds to the UNO-IDL module where to add the interface. If the text field is left empty, the interface will be added in the root module of the component (filled in the project wizard).
- Service name: is the service name. By keeping the default value, you will be able to define your own interface using the interface configuration page. Otherwise, you can reuse an existing interface.
- Published: specifies if the interface is published or not. The published notion is translated into a keyword in UNO-IDL language. Declaring a UNO-IDL type as published means that it will not change in future releases. We will keep it unchecked because our component is really far from being a stable API.
The interface configuration page

- Module: corresponds to the UNO-IDL module where the interface is added. If the text field is left empty, the interface will be added in the root module of the component (filled in the project wizard).
- Interface name: is the interface name. By convention, we generally name an interface beginning with an "X". In this tutorial, the interface will be named XHelloworld.
- Inherited interfaces: is a list of all the interfaces from which the one that is about to be created will inherit. This is one of the changes in UNO-IDL between OpenOffice.org 1.1.x and 2.0, and why the plugin does not support OpenOffice.org versions prior to 2.0. All the UNO-IDL interfaces are inheriting more or less directly from the com::sun::star::uno::XInterface type. As the XHelloworld interface is very easy, no super interface will be added. This will implicitly define XInterface as the only parent for the new interface.
- "?" column: specifies if the interface inheritance is mandatory or not. If the box is checked, the interface inheritance is optional and may not be implemented.
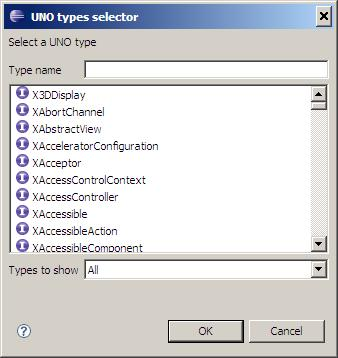
- "Add" and "Del" buttons: allows you to add an interface to the inherited ones or remove the selected interface. Iff a connection to OpenOffice (already running or bootstrapped by the plugin) was succesfully made, you will see: It may take up to a minute to appear depending on your machine.
- Members: is a list of all the methods and properties of the interface. See below for explanations about the members. In this tutorial, just create one string sayHello([in] boolean isBadBoy) method and a LadyName property.
- Published: specifies if the interface is published or not. The published notion is translated into a keyword in UNO-IDL language. Declaring a UNO-IDL type as published means that it will not change in future releases. We will keep it unchecked because our component is really far from being a stable API.

A UNO interface can contain two kind of members: methods and properties. When clicking on the Add button near the members' list, the following window will be shown. When double-clicking on a line in the members' list, you will edit the corresponding member through the same window.
When the window is opened to create a new member, you can choose whether the member will be a property or a method. The name and returned type fields are always present, but the lower part of the dialog is different for a method and a property.

- The arguments list: defines the name, type and direction of the parameters of the method. Simply click on the cell to edit it.
- Read-only and Bound check boxes: selecting these boxes sets the corresponding IDL flag on the property.
Tip: you can use Ctrl+Space to complete the type name in the Return type field and Type column.
Writing the implementation
After having completed the wizard, you need to write the component implementation. Hopefully a skeleton has been generated and opened. You need to complete the code where there are some TODOS. The generated project contains the following directories and files:
- source: directory containing your Java implementation classes.
- build: directory containing all the generated temporary files, such as the results of the specification files (.idl files) compilation (.urd files) or the class files corresponding to the specifications (.class files).
- idl: directory containing the specifications of the component.
- types.rdb: generated UNO types registry from which the classes files will be generated.
- JRE and the jars: describe the classpath of the component. They are visible only in the Java package explorer. The OpenOffice.org jars are changed if the OpenOffice.org version associated to the project is changed. In a future version, they will be packed in a user library to take less space in the tree.
The generated skeleton already contains the methods for the implementation registration. The only things to modify are:
- Change the code of the setters and getters for the defined properties.
- Change the code of the defined methods.
The Eclipse integration even manages the libraries needed by your implementation. Let us imagine that we want to use the Fraction class from the Apache common-math jar. Download this jar from the Apache website, and import the common-math-1.1.jar file into your component project, for example in a lib directory. Add the jar to the project build path in the same way than in any other Eclipse Java project and use it:
    // org.openoffice.helloworld.XHelloworld:
    private String mLadyName = "";

    public String getLadyName()
    {
        return mLadyName;
    }

    public void setLadyName(String the_value)
    {
        mLadyName = the_value;
    }

    public String sayHello(boolean isBadBoy)
    {
    	String hello = "Hello Mrs. " + getLadyName();
        if (isBadBoy) {
        	Fraction f = new Fraction(1, 3);
        	hello = "A third is " + f.doubleValue();
        }
        return hello;
    }
The above code shows you what could be an implementation of our component. Now, there is only to package it properly and test it.
Packaging and testing the component
Now we will show you how to export your component into an OpenOffice.org package. There is little to do apart from following these steps:
- Select the File > Export menu. Then choose the UNO > OpenOffice.org package export type.
- The next page of the wizard asks for the UNO project to export (already selected), the directory where to export the package and the OpenOffice.org minimum compatibility version for the package. Depending of the selected OpenOffice.org version, the package will get a different name and a different structure.
- Click on the Finish button. The wizard will ask you whether to deploy to package or not and asks for the old package removal if needed.
Then we will suppose that the package is deployed on the OpenOffice.org installation and we will test it using the following OooBasic macro.
Sub testHelloworld
	oHelloworld = createUnoService( "org.openoffice.helloworld.Helloworld" )
	oHelloworld.LadyName = "Robinson"
	print oHelloworld.sayHello( false )
	print oHelloworld.sayHello( True )
End Sub
This macro should open two message windows with "Hello Mrs. Robinson" and "A third is 0.3333333". Your first UNO component is now running, enjoy doing others.
Going further
This chapter is only for those who enjoyed this tutorial and want to know more about the UNO component creation in Java or other languages. The following is a list of useful links for any UNO developer:
- OpenOffice.org developer's guide is a huge source of documentation for any OpenOffice.org developer. You should probably have a look at chapters 3 and 4 for UNO component information.
- OOo Java reference is the UNO binding for Java reference.
- OOo C++ reference is the UNO binding for C++ reference.
- OOo Developer's Wiki is the wiki for all the OpenOffice.org developers. It contains useful information even for people who are just starting out with UNO.
- http://udk.openoffice.org/common/man/draft/multinherit.html for further information on what changes have been made in UNO-IDL between OpenOffice.org 1.1.x and 2.0
- Autodoc Java reference is the reference for javadoc like comments in UNO-IDL files.
- Autodoc C++ documentation is the reference for javadoc like comments in C++ components.
- URE C++ application tutorial explains how to create a C++ application based on the URE, that is a UNO C++ component that does not need OpenOffice.org.
Trouble shooting
- If you run into trouble it might be helpful to turn the log level to debug mode. This can be done inside Eclipse via Window > Preferences > OpenOffice.org Integration. The log file can be found in $YOURWORKSPACEPATH/.metadata/.log .
- If you run into trouble at deployment, make sure that no OpenOffice process is running
- If redeployment does not work, because the previously installed plugin can not be deleted, use <OpenOffice Installation>\program\unopkg to delete it manually
- If you plan to use the OpenOffice version that comes with your distribution try using the according SDK (in Ubuntu it is the package openoffice.org-dev). If there is no such package and you run into trouble not getting the skeletons and opening of an external editor you probably have to create a symbolic link to /usr/lib/libstlport_gcc.so from the official version of libstlport_gcc.so extracted from an official download of OOo.
- On Unix running setsdkenv_unix in your SDK directory might helpful as well.