Writer واسط کاربر
فضای کاری اصلی Writer در تصویر زیر نشان داده شده است.

منوها
نوار منو (Menu Bar) در بالای پنجره Writer، درست زیر نوار عنوان (Title Bar) قرار دارد. وقتی شما یکی از منوها را انتخاب میکنید یک زیرمنو (Submenu) پایین میافتد تا دستورات را نمایش دهد.
- File شامل دستوراتی است که به کل سند اِعمال میشوند. مانند: Open, Save, وExport as PDF.
- Edit شامل دستوراتی است که برای ویرایش سند استفاده میشوند. مانند Undo وFind & Replace.
- View شامل دستوراتی برای نظارت بر نمایش سند است Zoom وWeb Layout.
- Insert شامل دستوراتی برای درج عناصری داخل سند است headers, footers, و pictures.
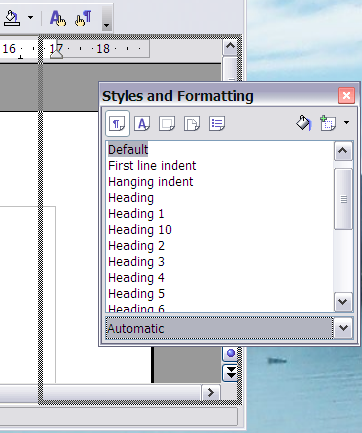
- Format شامل دستوراتی برای قالببندی طرحواره سند شما است. مانند Styles and Formatting, Paragraph, و Bullets and Numbering.
- Table تمام دستورات درج و ویرایش جدول در سند متنی را نمایش میدهد.
- Tools شامل توابعی است همچون Spellcheck, Customize, و Options.
- Window شامل دستوراتی برای نمایش پنجره است.
- Help شامل پیوندهایی به Help فایل, What’s This?, و اطلاعاتی درباره برنامه است. See Getting help.
نوارابزارها
رایتر انواع متعددی نوارابزار دارد: چسبان, شناور, وtear-off. نوارابزارهای چسبان میتوانند به محلهای متفاوت منتقل شوند و یا شناور بشوند و نوارابزارهای شناور هم میتوانند چسبان بشوند.
نوارابزار چسبان بالا (موقعیت پیشفرض) نوارابزار Standard خوانده میشود. نوارابزار استاندارد در سرتاسر برنامههای اپنآفیس استوار است.
دومین نوارابزار سرتاسر بالا (محل پیشفرض) نوارابزار قالب بندی یا (Formatting) است که حساس نسبت به متن (Context-Sensitive) است و در پاسخ به موقعیت جاری مکاننما و یا موقعیت انتخابشده ابزارهای مرتبط را نشان میدهد. برای مثال، وقتی مکاننما روی تصویر است نوارابزار قالببندی ابزارهایی را برای قالببندی تصویرها تهیه میکند و وقتی مکاننما روی متن است ابزارهای نمایش دادهشده، ابزارهای قالببندی متن هستند.
نشان دادن یا پنهان کردن نوارابزارها
برای نشان دادن و یا پنهان کردن نوارابزارها View >Toolbars را برگزینید. آنگاه در فهرست، روی نام نوارابزار کلیک کنید. در کنار نام نوارابزار فعال یک Check Mark نمایش داده میشود. نوارابزارهای Tear-Off در نمای View فهرست نشدهاند.
زیرمنوها و نوارابزارهای Tear-Off
آیکونهای نوارابزار با مثلث کوچکی به سمت راست submenus, tear-off toolbars, و دیگر راههای انتخاب چیزها را بسته به آیکون نشان میدهند.


نوارابزارهای Tear-Off میتوانند در گوشه صفحه نمایش و یا در یکی از ناحیههای نوارابزار موجود شناور شده یا چسبان شوند.ببینید Moving toolbars.
جابهجایی نوارابزارها
برای جابهجایی یک نوارابزار چسبان اشارهگر ماوس را بالای دستگیره نوارابزار قرار بدهید، دکمه سمتچپ ماوس را پایین نگه دارید، نوارابزار را به محل جدید بکشید و سپس دکمه ماوس را رها کنید.

برای جابهجایی یک نوارابزار شناور روی نوارعنوان آن کلیک کنید و آن را به محل جدید بکشید.

نوارابزارهای شناور
Writer نوارابزارهای متعدد و حساس نسبت به متن اضافهای نیز دارد که به طور پیشفرض به صورت نوارابزارهای شناور در پاسخ به موقعیت جاری مکاننما و یا موقعیت انتخابشده ظاهر میشوند. برای مثال وقتی مکاننما در یک جدول است نوارابزار شناور Table ظاهر میشود, و وقتی مکاننما در یک فهرست شمارهدار و یا بولت است the Bullets and Numbering نوارابزار Bullets and Numberingظاهر میشود. اگر مایل باشید میتوانید این نوارابزارها را به بالا، پایین یا پهلوی پنجره بچسبانید. ببینید
Moving toolbars).
نوارابزارها و برخی پنجرهها مانند: ناوبر و سبکها و پنجره قالببندی چسبان هستند. شما میتوانید آنها را جابهجا کنید، تغییر اندازه بدهید و یا به گوشهای بچسبانید.
برای چسباندن یک پنجره یکی از کارهای زیر را انجام بدهید:
- روی نوارعنوان پنجره کلیک کنید و آن را به پهلو بکشید تا جایی که جعبه پنجره اصلی نمایان شود و سپس پنجره را رها کنید. این روش بستگی به تنظیمات مدیر پنجره سیستم شما دارد و ممکن است برای شما کار نکند.
-
 Docking a window

- کلید Control را پایین نگه دارید و روی بخش پنجره شناور کلیک کنید تا در آخرین موقعیت خود چسبانده شود. اگر کار نکرد این بار بدون استفاده از دکمه Control دو بار کلیک کنید.
- برای غیر چسبان کردن پنجره کلید Control را پایین نگه دارید و روی بخشی از پنجره چسبان کلیک کنید.
سفارشیسازی نوارابزارها
شما میتوانید نوارابزارها را در راههای متعددی سفارشی کنید. راههایی همچون: برگزیدن اینکه کدام آیکون ها دیده شوند و موقعیت نوارابزارهای چسبان را قفل کنند. شما همچنین میتوانید آیکونها را اضافه کنید و نوارابزارهای جدیدی ایجاد کنید. در فصل ۱۷ شرح داده شده است. برای دسترسی به گزارههای سفارشیسازی نوارابزارها از پیکان پاییننمایی استفاده کنید که در انتهای نوارابزار و یا روی نوارعنوان آن قرار دارد.

برای نشان دادن و یا پنهان کردن آیکونهایی که برای نوارابزار انتخابشده، تعیین شدهاند Visible Buttons را از منوی پایینافت برگزینید. آیکونهای مریی علامت Check Mark بعد از خود دارند. برای انتخاب و یا عدم انتخاب آیکونها روی آنها کلیک کنید.
منوهای (زمینه) راستکلیک
شما میتوانید با راست کلیک کردن روی یک پارارگراف، تصویر و یا دیگر اشیاء، به سرعت به بسیاری از توابع منوها دست پیدا کنید. منوی زمینه بالا خواهد آمد. اغلب، منوی زمینه سریعترین و آسانترین راه دست یافتن به یک تابع است. اگر نمیدانید یک تابع در کجای منوها و نوارابزارها قرار گرفته، اغلب میتوانید آن را با راست کلیک پیدا کنید.
خطکشها
To show or hide rulers, choose View > Ruler. To enable the vertical ruler, choose Tools > Options > OpenOffice.org Writer > View and select Vertical ruler.

Status bar
The Writer status bar provides information about the document and convenient ways to quickly change some document features. From left to right, the fields are as follows.
Page number
Shows the current page number, the sequence number of the current page (if different), and the total number of pages in the document. For example, if you restarted page numbering at 1 on the third page, its page number is 1 and its sequence number is 3.
If any bookmarks have been defined in the document, a right-click on this field pops up a list of bookmarks; click on the required one.
To jump to a specific page in the document, double-click in this field. The Navigator opens (see page 13). Click in the Page Number field and type the required page number.
Page style
Shows the style of the current page. To change the page style, right-click on this field. A list of page styles pops up; choose a different style by clicking on it.
To edit the page style, double-click on this field. The Page Style dialog box opens.
Language
Shows the language for the selected text.
Click to open a menu where you can choose another language for the selected text or for the paragraph where the cursor is located. You can also choose None to exclude the text from spellchecking or choose More... to open the Character dialog box.
Insert mode
Click to toggle between Insert and Overwrite modes when typing.
Selection mode
Click to toggle between STD (Standard), EXT (Extend), ADD (Add) and BLK (Block) selection. EXT is an alternative to Shift+click when selecting text. See Chapter 3 (Working with Text) for more information about ADD and BLK.
Digital signature
If the document has been digitally signed, an icon [[Image:]] shows in this part of the Status bar. You can double-click the icon to view the certificate.
Section or object information
When the cursor is on a section or object (such as a picture), information about that item appears in this field. Double-clicking in this area opens a relevant dialog box.
| Object | Information shown | Dialog box opened |
| Picture | Size and position | Format Picture |
| List item | Level and list style | Bullets and Numbering[1] |
| Heading | Outline numbering level | Bullets and Numbering1 |
| Table | Name or number and cell reference of cursor | Table Format |
| Other | (Blank) | Fields (Cross References page) |
1 If a list style was used with a list item or heading, no dialog box appears.
View layout
Click the appropriate icon to change between single page, side-by-side, and book layout views. You can edit the document in any view.

Zoom
To change the view magnification, drag the Zoom slider or click on the + and – signs. You can also right-click on the zoom level percentage to select a magnification value. Zoom interacts with the selected view layout to determine how many pages are visible in the document window.
![]()
Changing document views
Writer has several ways to view a document: Print Layout, Web Layout, and Full Screen. To access these and other choices, go to the View menu and click on the required view. (When in Full Screen view, press the Esc key to return to either Print or Web Layout view.)
When in Web Layout, you can use the Zoom slider on the Status bar, as described above. In Print Layout, you can use both the Zoom slider and the View Layout icons on the Status bar.
You can also choose View > Zoom from the menu bar to display the Zoom & View Layout dialog box, where you can set the same options as on the Status bar. In Web Layout view, most of the choices are not available.

| Content on this page is licensed under the Creative Common Attribution 3.0 license (CC-BY). |
Cite error: <ref> tags exist, but no <references/> tag was found