Working With Tables in Writer
Template:Documentation/DraftPage
Contents
Creating and Customizing Tables
There are two ways to insert a table in a Writer document:
Using the Table icon
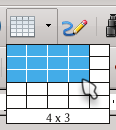
- Place the cursor where you want the table to appear
- Click the arrow to the right side of the Table
 icon
icon
- In the drop down grid, select the number of rows and columns for the table
Using the Insert Table dialog box
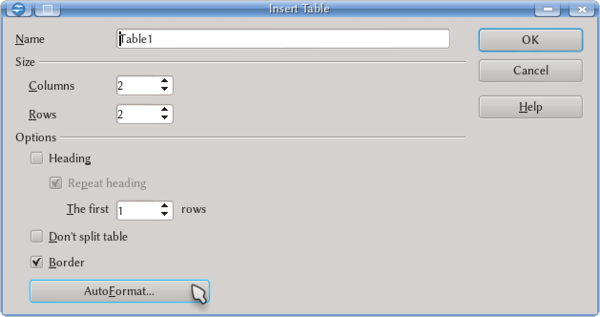
To open the dialog box, select Table → Insert → Table or Ctrl + F12 or left click the Table icon. From this dialog box you can:
- Select the number of rows and columns of the table
- Give a name to the table to later distinguish it in the Navigator
- Select the Heading option to define the first row in the table as the heading
- Select the Repeat heading option to repeat the heading row if the table spans more than one page
- Select the Don't split table option to prevent the table from spanning more than one page
- Select the Border option to surround each cell of the table with a border
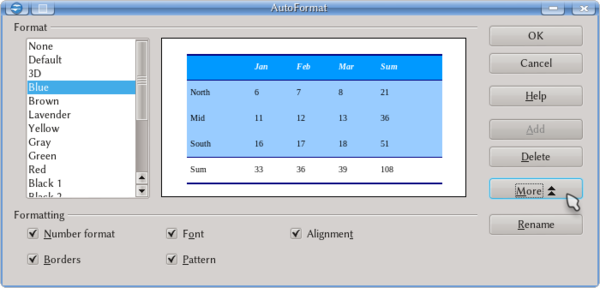
The AutoFormat button opens the following dialog box:
From here it is possible to choose between different predefined formats.
If none of the predefined autoformats have the desired characteristics for your table, you can tune the format of the table or of a particular cell with the contextual Table toolbar. Open the toolbar by placing the cursor is inside a table cell or select View → Toolbars → Table. If you wish to save the formatting you just created, place your cursor inside the table, and select Table → AutoFormat and then press Add . Provide a name for the new AutoFormat so you can find it later.
Creating nested tables
You can create tables within tables. To achieve this, click in a cell of an existing table, and follow any method as described above to insert another table.
Captioning a table
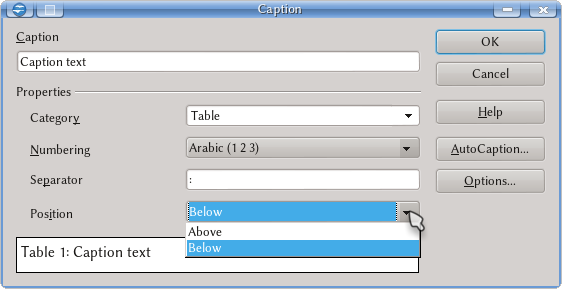
It is possible to assign a caption to a table, numbering it at the same time, with a right click → Caption.
As shown in the screenshot it is possible to choose the numbering, the separator between number and text, and if the caption will be shown above or below the table.
With the AutoCaption button it is possible to set that all the inserted tables are automatically associated to a caption, while the Options gives the chance to define if the table number needs to reflect the chapter number, also. We will come back to this later.
It is important to note that the drop down menu "Category" can be edited. For example, if you want "Data" instead of "Table", you can click over the white box where the word "Table" is, and edit the text in the box to create another category
Number Recognition and Data Operations
By default, Writer tries to guess which kind of data you insert on a table and format the content accordingly. For example, if you insert "10/2" Writer will interpret it as a date and change it into "10/02/13" (the result may depend on your settings under Tools → Options → Language Settings → Languages → Locale setting). To disable this, go to Tools → Options → OpenOffice Writer → Table and under "Input in tables" disable "Number recognition".
With tables on Writer it is possible to operate with data introduced on cells, for example obtaining the sum over a column.
| The operation you can do on a table on Writer are limited. If you need to perform complex calculations you need to use Calc instead. Remember that you can insert a Calc sheet on a Writer document as OLE object |
TODO: talking about the Formula toolbar ( F2 ) and how to use it


