Difference between revisions of "Documentation/UserGuide/Writer/Intro/Tables"
Sahlers621 (Talk | contribs) |
|||
| Line 1: | Line 1: | ||
{{Documentation/DraftPage}} | {{Documentation/DraftPage}} | ||
| − | {{DISPLAYTITLE:Working With Tables | + | {{DISPLAYTITLE:Working With Tables in Writer}} |
| − | {{Documentation/Note| | + | {{Documentation/Note|At the beginning of a document or a section in order to introduce content before the table it is necessary to go to the first cell (top left) and press {{Key|Enter}}}} |
| − | There are two ways to insert a table | + | There are two ways to insert a table in a Writer document: |
| + | The first is to use the corresponding button on the "Standard" toolbar, as shown in the following screenshot: | ||
| Line 19: | Line 20: | ||
[[File:AOO-InsertTableMenu.png|600px]] | [[File:AOO-InsertTableMenu.png|600px]] | ||
| − | + | In this dialogue it is possible, other than selecting the number of rows and columns give a name to the table to later distinguish it on the Navigator. | |
The {{Button|AutoFormat}} offers the following dialogue: | The {{Button|AutoFormat}} offers the following dialogue: | ||
Revision as of 00:20, 9 February 2013
Template:Documentation/DraftPage
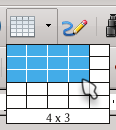
There are two ways to insert a table in a Writer document: The first is to use the corresponding button on the "Standard" toolbar, as shown in the following screenshot:
On the grid it is possible to select the number of rows and columns needed.
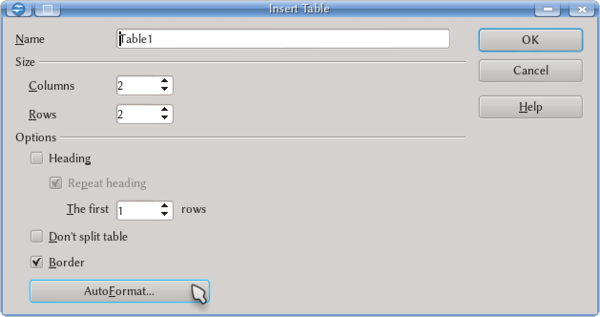
The other way to insert a table gives greater control: Table → Insert → Table or Ctrl + F12
In this dialogue it is possible, other than selecting the number of rows and columns give a name to the table to later distinguish it on the Navigator.
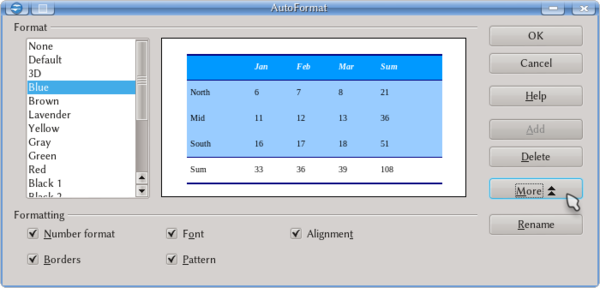
The AutoFormat offers the following dialogue:
Here it is possible to choose between different predefined formats (different line types, cell colours, text format...).
If none of the predefined autoformats have the desired characteristics, it is possible to tune the format of the table or of a particular cell either with the contextual toolbar "Table" that it is presented when the cursor is inside a table cell or with Table → Table Properties or with a right click Table.
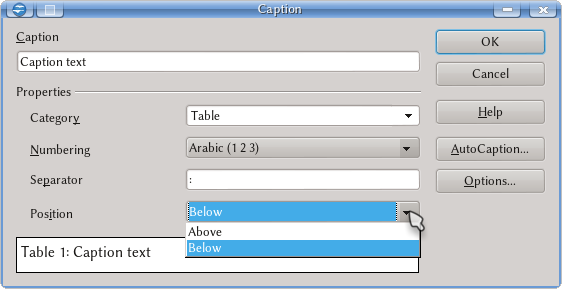
It is possible to assign a caption to a table, numbering it at the same time, with a right click → Caption
As it is possible to see on the screenshot it is possible to choose the numbering, the separator between number and text and if the caption will be shown above or bellow the table.
With the AutoCaption button it is possible to set that all the inserted tables are automatically associated to a caption, while the Options gives the chance to define if the table number needs to reflect the chapter number too. We will come back to this later.
It is important to note that the drop down menu "Category" can be edited: for example, if we want "Data" instead of "Table", it is enough to edit the text present there.


