Documentation/OOoAuthors User Manual/Writer Guide/Removing blank lines in addresses
Removing blank lines in addresses
A common situation is that some addresses may have no information in some fields. For example, you may have an “address1” field and an “address2” field to deal with multi-line addresses, or a “company name” field that may be blank in some cases. When you print a form letter, address label, or envelope, you will not want a blank line to appear when the field is empty. This section describes how to suppress blank lines.
Note – Very Important! Be sure your field names (or column headings in a spreadsheet) do not contain spaces or the technique described here does not work.
Normally you would enclose a field name in quotation marks if the name contains a space. However, a quoted string is not acceptable in the Condition box for a hidden section and an un-quoted string stops on the first space in the field name, effectively making the condition always True and causing the section to be hidden even if the field has data in it.
Removing blank lines in addresses on form letters
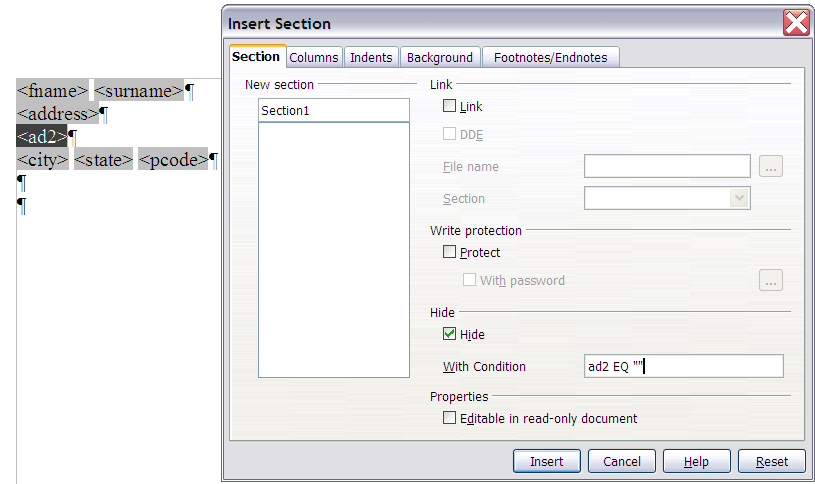
- The figure below shows a typical address block with field highlighting on. The field <ad2> is the second address line, which may be blank for some addresses, so you want to have that whole line hidden if the field is blank.
- Select the <ad2> field, and then select Insert > Section from the menu bar. In the Insert Section dialog, select the Hide checkbox. In the With Condition box, type the field name (ad2 in this case) and EQ "" (which means “equals a blank record”). Click Insert.
Back in the document, if you have section markers showing, you will see something similar to the figure below.
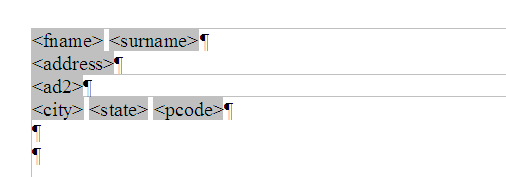
Section containing second address line.
Now, when you do a mail merge using this document, the line inside the section (including its paragraph marker) will be hidden if the field <ad2> is blank.
Removing blank lines in labels
The process for removing blank lines in labels is a bit different.
- When setting up your labels (as described in Printing mailing labels), select the Synchonise contents checkbox on the Options tab of the Labels dialog. Continue as described in that section.
- When you click New Document, a page of labels is displayed, showing the field names. If you do not already have paragraph markers showing, display them now. (Click the Nonprinting Characters icon, which looks like a backwards P.) Notice there is only one paragraph mark in each label, at the end of the last line.
- To make this technique work, you need to have a paragraph mark at the end of each line. To do this, go to the first label (upper left corner), place the cursor at the end of the first line, press Enter, and then press Delete. This inserts a paragraph mark at the end of the first line. Repeat for each of the other lines except the last. Do this only in the first label.
- Click the Synchronize Labels button in the upper left. Now all the labels have paragraph marks at the end of each line.
- In the first label on the page, select the field you wish to hide if it is blank. In our example, that is <ad2>. Click Insert > Section on the menu bar. In the Insert Section dialog, select the Hide checkbox. In the With Condition box, type the field name (ad2 in this case) and EQ "". Click Insert. The <ad2> line in the first label may disappear. Do not be concerned if this happens.
- Click Synchronize Labels. Now all the labels look the same.
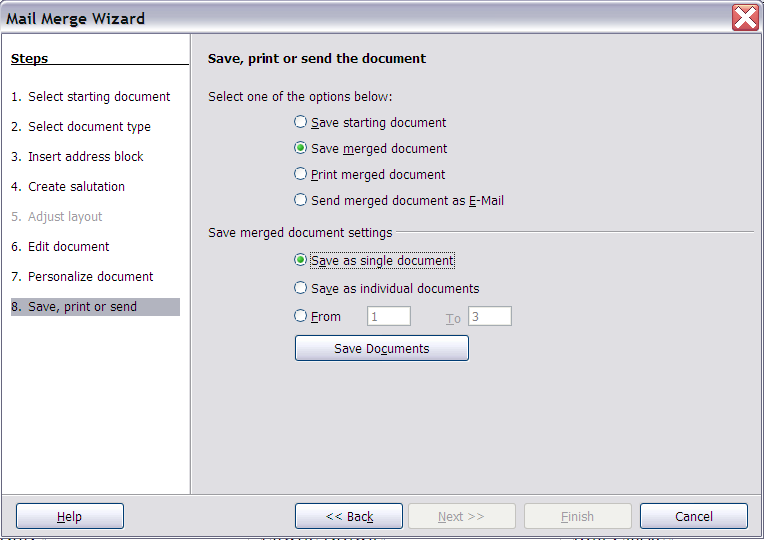
- Select Tools > Mail Merge Wizard. In Step 1 of the wizard (Figure 23), select Use the current document. Then select step 8 (Save, print, or send). A labels document is created, and the last page of the Mail Merge Wizard remains open (Figure 43).
- Select Save starting document and click the Save starting document button. This saves all your work setting up the labels.
- The dialog remains open. Select Save merged document and Save as single document, or select Print merged document. All the pages of labels are printed or saved.
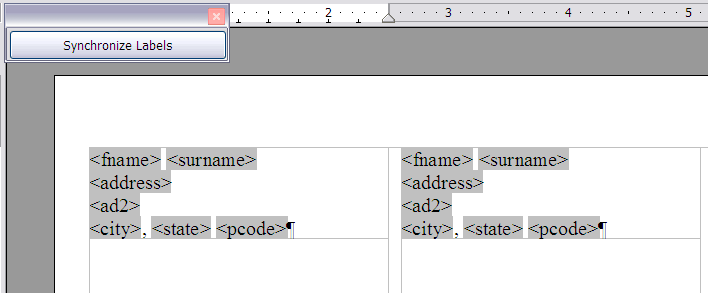
Labels showing only one paragraph mark each.
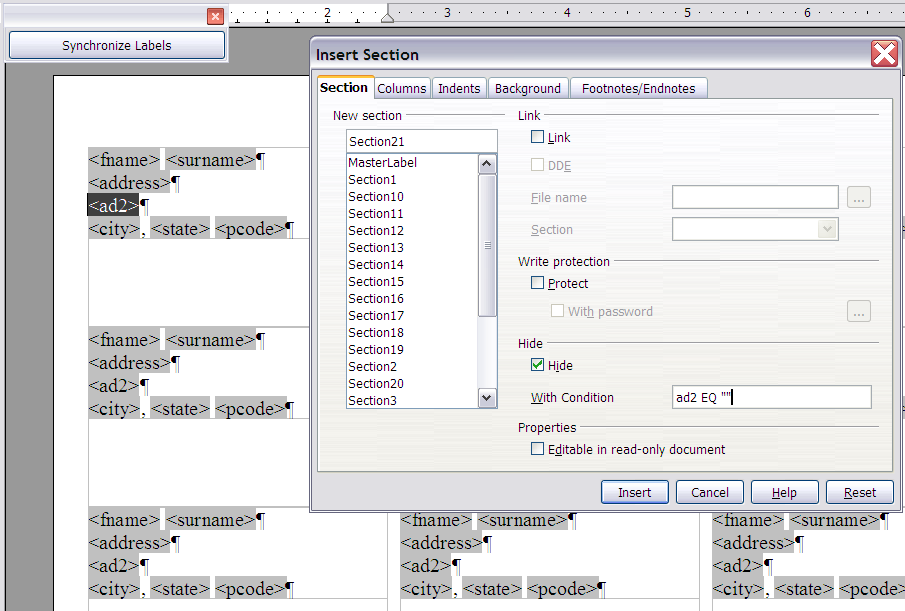
Setting the condition for a hidden section.
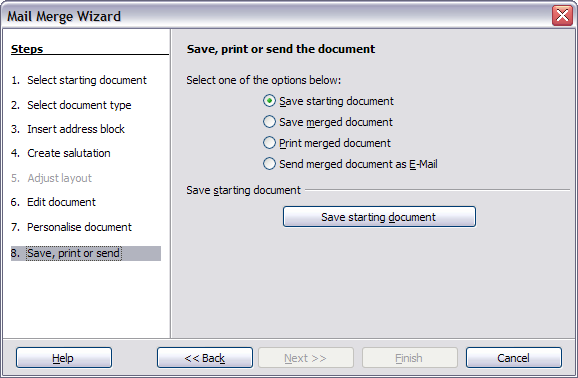
Saving the document you just created.
Removing blank lines from envelope addresses
After you set up the envelope (see Printing envelopes), use the technique described in steps 1 through 5 in Removing blank lines in addresses to remove the blank lines. Then continue with printing the envelopes as described in Merging and printing the envelopes.
| Content on this page is licensed under the Creative Common Attribution 3.0 license (CC-BY). |

