Page numbering
Contents
Page styles and page numbering
Many people first encounter page styles when they want to number pages. OpenOffice.org has a powerful system for numbering pages.
Preliminaries: fields
OpenOffice.org uses a feature called fields to manage page numbers. To insert a page number field, position the cursor where you want to insert the number and choose Insert > Fields > Page Number. The page number appears with a gray background. The gray background denotes a field.
Note: The gray background is simply there to denote a field. This background is not printed. Choose View > Field Shadings (or press Ctrl+F8) to turn this feature off.
If you have seen lists in OOo, you might have noticed this gray background. OOo lists use fields. The page number field always displays the page number for the current page. If you see the words “Page number" instead of a number, press Ctrl+F9. This shortcut key toggles OOo between displaying the field's contents (what the field is for) and the field's results (what the field creates).
Note: For a full introduction to fields, see Chapter 14 (Working with Fields).
Inserting a header
In OOo, headers are specified by page styles.
- Open the Page Style dialog box for the desired page style (right-click > Modify).
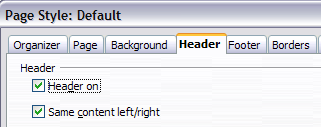
- Select the Header tab.
- Under Header, check Header on and click OK.
-
Turn on page header.

At this point you should see the (empty) header on the current page. In the example below, the header area is identified, purely for illustrative purposes. It would normally be empty immediately after being turned on, until you insert your own header text and formatting.

A page with a page header.
What's so special about headers? The same text in the header appears on all pages with that page style. (You can experience this yourself by entering some text into the header.) This property of headers (or footers), along with fields, forms the basis of OOo page numbering.
Tip: You can also add a header through the Insert menu: Insert > Header > [page style]. Likewise, for footers: Insert > Footer > [page style].
Caution: The Insert Menu can also be used for deleting a preexisting header or footer for a page style. If that page style has a check mark in front of it, pointing to it will open an OOo dialog box warning about this and asking whether you want to delete the header or footer for that particular page style.
Simple page numbering
The simplest case is to have the page number at the top of every page and nothing more. To do this, put the cursor on the header and select Insert > Fields > Page Number.

Page number inserted in the header.
Presto! Now, the correct page number appears on every page.
More complex variations
There are a lot of interesting variations that you can apply without further knowledge of page styles. Here are some suggestions:
- Right-align the header to make the page number appear on the top-right:
- Place the cursor in the header.
- Click the Align Right icon (or right-click anywhere in the header and select Alignment > Right).
- Add (type) the word page so the header reads page 1, page 2, and so on. This also requires using the Page Number field, discussed earlier.
- Add the document title so the header reads, for example: Joe's favourite poems, left justified, and page x with right justification, where x is the value of the Page Number field. Consider using a tab to separate the title from the page number.
- OOo also has a Page Count field (Insert > Fields > Page Count). Using it, you could, for example, have a header that reads page 2 of 12.
These variations are all illustrated below.

Variations on the simple page numbering method.
Many more variations are possible. For example, you can use a footer instead of a header to make the page number appear at the bottom of the page. You can also include the chapter number with the page number: see "Numbering pages by chapter" in Chapter 4 (Formatting Pages).
Example: Restart page numbering: a preface
Some times you want to reset the page number back to 1. A typical example is the preface for a book. A standard preface has the following properties:
- Page numbers are displayed in Roman numerals (i, ii, iii, iv, …).
- After the preface, the document starts on a Default page.
- The page number resets to 1, and the number format becomes Arabic (1, 2, 3, 4, ...).
Resetting the page number requires page breaks.
First, let's get the preliminary work done for the Preface style:
- Create a new page style and name it Preface.
- Set its Next Style to Preface because a preface could span multiple pages.
- Add a header to Preface and insert the Page Number field. Make the page numbers display as Roman numerals (i, ii, iii, iv, …):
- Open the page style window for Preface (if not already open) and click the Header tab. Check Header on under Header.
- Click the Page tab. Under Layout settings, in the Format drop-down list, set the format to i, ii, iii, .... (See the bottom right of the figure below.) Click OK to close the dialog box.
-
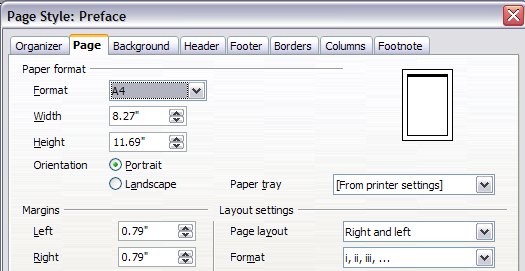
Set page number format to Roman numerals.

After the preface is written, we are ready to restart the page numbering in the main body of the document to Arabic numerals. Follow these steps:
- Make an empty paragraph at the very end of the preface.
- Put the cursor on the blank line.
- Choose Insert > Manual Break.
- Select Page break and choose the Default style.
- Select the Change page number check box and set the new value to 1. Click OK to close the dialog box.
These settings are shown below.

Set the new page number to 1 and the page style to Default.
Note: You cannot assign an odd page number to a left page or an even page number to a right page. OOo strongly adheres to the convention that odd page numbers go on right-hand pages and even page numbers on left-hand pages.
This change is also reflected on the status bar. The Page section of the status bar now includes both the total page count and the entry of the page number field.

Page number in the status bar.
Example: Different headers on right and left pages
When you insert a header on a page style set up for mirrored pages or right-and-left pages, you can have the contents of the header be the same on all pages or be different on the right and left pages.
To allow different content in headers, clear the Same content left/right check box in the Header area on the Header page of the Page Style dialog box.

Different header content.
Now, you can put the page number on the left-hand edge of the left pages and on the right-hand edge of the right pages, put the document title on the right-hand page only, or make other changes. An example is shown below.

Different content on left and right pages.
| Content on this page is licensed under the Creative Common Attribution 3.0 license (CC-BY). |