Difference between revisions of "Documentation/OOoAuthors User Manual/Getting Started/Saving files"
From Apache OpenOffice Wiki
| Line 21: | Line 21: | ||
::[[Image:EnterPassword.png|thumb|none|500px|Enter Password prompt]] | ::[[Image:EnterPassword.png|thumb|none|500px|Enter Password prompt]] | ||
| − | {{ | + | {{Note|Passwords must contain a minimum of 5 characters. Until you have entered 5 characters, the '''OK''' button remains inactive.}} |
==Saving a document automatically== | ==Saving a document automatically== | ||
Latest revision as of 07:31, 2 July 2018
To save a new file:
- Choose File > Save As.
- When the Save As dialog appears, enter the file name and verify the file type (if applicable).
To save an open document with the current file name, choose File > Save. This will overwrite the last saved state of the file.
Password protection
To protect an entire document from being viewable without a password, use the option on the Save As dialog to enter a password. This option is only available for files saved in OpenDocument formats or the older OpenOffice.org 1.x formats.
- On the Save As dialog, select the checkbox beside Save with password, and then click Save. You will receive a prompt.
- Type the same password in the Password field and the Confirm field, and then click OK. If the passwords match, the document is saved password protected. If the passwords do not match, you receive the prompt to enter the password again.
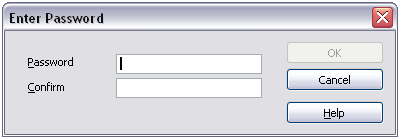 Enter Password prompt

| Passwords must contain a minimum of 5 characters. Until you have entered 5 characters, the OK button remains inactive. |
Saving a document automatically
You can choose to have OpenOffice.org save files for you automatically. Automatic saving, like manual saving, overwrites the last saved state of the file. To set up automatic file saving:
- Choose Tools > Options > Load/Save > General.
- Mark Save AutoRecovery information every, and set the time interval.

| Content on this page is licensed under the Creative Common Attribution 3.0 license (CC-BY). |