Selecting objects
Contents
Direct selection
To select an object, the easiest way is to click directly on it. For objects that are not filled, you have to click directly on the object’s outline to select it.
Selection by framing
You can select several objects at once by using the mouse to drag a large rectangle around the objects with the Select button, as shown. For this to work the ![]() icon on the Draw toolbar must be active.
icon on the Draw toolbar must be active.
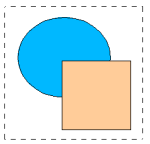
Only objects that lie entirely within the rectangle will be selected.
Even if objects are located behind others and not visible, they can still be selected. To select an object that is covered by another object, hold down the Alt key and click the object. To select an object that is covered by several objects, hold down the Alt key and click through the objects until you reach the required underlying object. To cycle through the objects in reverse order, hold down the Alt+Shift keys when you click. To help in making accurate selections, you can check the number and type of the selected objects, shown at the left of the status bar.
To select an object that is covered by another object using the keyboard, use the Tab key to cycle through the objects, stopping at the object you wish to select. To cycle through the objects in reverse order, press Shift+Tab. This is a very quick way to reach the object you want, but it may not be practical if you have a large number of objects in your drawing.
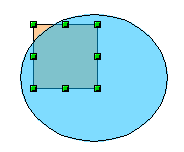
When you click on the selected object, its outline will appear briefly through the objects on top of the selected object.
In the illustration below, the square located beneath the circle was selected in this way (the circle was made semi-transparent in order to see the square).
Arranging objects
In a complex drawing, you may have objects stacked up, one on top of the other, with the result that a particular object is hidden by one or more other objects above it. You can rearrange the stacking order of objects (move an object to the front or to the back of the stack) by selecting the object, clicking Modify > Arrange and selecting the appropriate Bring Forward or Send Backward option, or by right-clicking the object and selecting Arrange from the context menu, then selecting from the list of Bring Forward or Send Backward options.
On the Drawing toolbar the Arrange tear-off menu on the ![]() button; this menu contains the above options. A keyboard shortcut is Shift+Ctrl++ to bring an object to the top, and Shift+Ctrl+− to send an object to the bottom.
button; this menu contains the above options. A keyboard shortcut is Shift+Ctrl++ to bring an object to the top, and Shift+Ctrl+− to send an object to the bottom.
An exception to the above is an object which is located on the Controls layer. Such objects always lie above all other objects and are located within a separate stack on the Controls layer.
Selecting several objects
To select or de-select several objects one by one, hold down the Shift key and click on the various objects to be selected or de-selected. One click on an object selects it, a second click de-selects it.
| Content on this page is licensed under the Creative Common Attribution 3.0 license (CC-BY). |

