Difference between revisions of "Documentation/OOo3 User Guides/Writer Guide/Tables of contents"
Clairedwood (Talk | contribs) ((checkpoint save)) |
Clairedwood (Talk | contribs) |
||
| Line 25: | Line 25: | ||
<li>Click in the document where you want the TOC to appear. | <li>Click in the document where you want the TOC to appear. | ||
<li>Choose '''Insert > Indexes and Tables > Indexes and Tables'''. | <li>Choose '''Insert > Indexes and Tables > Indexes and Tables'''. | ||
| − | <li>Click '''OK'''. The result will be a typical table of contents. | + | <li>Click '''OK'''. The result will be a typical table of contents.</li> |
[[Image:WG12-2.png|thumb|none|500px|''Table of contents example.'']] | [[Image:WG12-2.png|thumb|none|500px|''Table of contents example.'']] | ||
</ol> | </ol> | ||
| − | + | Some tips you may find useful: | |
| − | + | * If some of your headings do not show up in the table of contents, check that the headings have been tagged with the correct paragraph style. If a whole level of headings does not show up, check the settings in '''Tools > Outline Numbering'''. See [[Documentation/OOo3_User_Guides/Writer_Guide/Defining_hierarchy| Defining a hierarchy of headings]] in Chapter 6 (Introduction to Styles) for more information. | |
| − | + | ||
| − | + | * The TOC appears with a gray background. This background is there to remind you that the text is generated automatically. It is not printed and does not appear if the document is converted to a PDF. To turn off this gray background, go to '''Tools > Options > OpenOffice.org > Appearance''', then scroll down to the ''Text Document'' section and deselect the option for '''Index and table shadings'''. | |
| − | + | This change may leave a gray background showing behind the dots between the headings and the page numbers, because the dots are part of a tab. To turn that shading off, go to '''Tools > Options > OpenOffice.org Writer > Formatting Aids''' and deselect the option for ''Tabs''. | |
| + | |||
| + | * If you cannot place the cursor in the TOC, choose '''Tools > Options > OpenOffice.org Writer > Formatting Aids''', and then select '''Enable''' in the ''Cursor in protected areas'' section. | ||
| + | |||
| + | If you add or delete text (so that headings move to different pages) or you add, delete, or change headings, you need to update the table of contents. To do this: | ||
| + | |||
| + | # Click anywhere in the TOC. | ||
| + | # Right-click and select '''Update Index/Table''' from the pop-up menu. | ||
{{CCBY}} | {{CCBY}} | ||
[[Category: Writer Guide (Documentation)]] | [[Category: Writer Guide (Documentation)]] | ||
Revision as of 13:13, 4 June 2010
- Tables of contents
- Customizing a table of contents
- Using the Index/Table page
- Using the Entries page
- Using the Styles, Columns, and Background pages
- Maintaining a table of contents
- Alphabetic indexes
- Customizing index entries
- Customizing the appearance of an index
- Maintaining an index
- Other types of indexes
- Bibliographies
- Creating a bibliographic database
- Adding a reference (citation) into a document
- Formatting the bibliography
- Defining the paragraph style for the bibliography
- Updating and editing an existing bibliography
Writer’s table of contents feature lets you build an automated table of contents from the headings in your document. Whenever changes are made to the text of a heading in the body of the document or the page on which the heading appears, those changes automatically appear in the table of contents which it is next updated.
Before you start, make sure that the headings are styled consistently. For example, you can use the Heading 1 style for chapter titles and the Heading 2 and Heading 3 styles for chapter subheadings. This section shows you how to:
- Create a table of contents quickly, using the defaults.
- Customize a table of contents.
Creating a table of contents quickly
Most of the time you will probably find the default table of contents to be what you need. Inserting a default TOC is simple:
- When you create your document, use the following paragraph styles for different heading levels (such as chapter and section headings): Heading 1, Heading 2, and Heading 3. These are what will appear in your TOC. Writer can evaluate up to ten levels of headings.
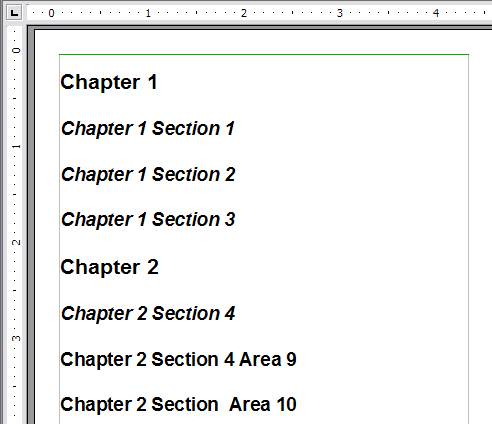 Headings example.
- Click in the document where you want the TOC to appear.
- Choose Insert > Indexes and Tables > Indexes and Tables.
- Click OK. The result will be a typical table of contents.


Some tips you may find useful:
- If some of your headings do not show up in the table of contents, check that the headings have been tagged with the correct paragraph style. If a whole level of headings does not show up, check the settings in Tools > Outline Numbering. See Defining a hierarchy of headings in Chapter 6 (Introduction to Styles) for more information.
- The TOC appears with a gray background. This background is there to remind you that the text is generated automatically. It is not printed and does not appear if the document is converted to a PDF. To turn off this gray background, go to Tools > Options > OpenOffice.org > Appearance, then scroll down to the Text Document section and deselect the option for Index and table shadings.
This change may leave a gray background showing behind the dots between the headings and the page numbers, because the dots are part of a tab. To turn that shading off, go to Tools > Options > OpenOffice.org Writer > Formatting Aids and deselect the option for Tabs.
- If you cannot place the cursor in the TOC, choose Tools > Options > OpenOffice.org Writer > Formatting Aids, and then select Enable in the Cursor in protected areas section.
If you add or delete text (so that headings move to different pages) or you add, delete, or change headings, you need to update the table of contents. To do this:
- Click anywhere in the TOC.
- Right-click and select Update Index/Table from the pop-up menu.
| Content on this page is licensed under the Creative Common Attribution 3.0 license (CC-BY). |