Accessing data sources
The most common use for a form is as the front end of a database. You can provide a form that allows users to enter information into a contacts database and, because it is part of a Writer document, the form can contain all the graphics, formatting, tables and other elements to make it look just the way you want. Even better, modifying the form is as simple as editing a document.
OpenOffice.org can access numerous data sources. These include ODBC, MySQL, Oracle JDBC, spreadsheets and text files. As a general rule, databases can be accessed for read and write; other data sources (such as spreadsheets) are read-only.
Creating a database
Chapter 8 (Getting Started with Base) in the Getting Started guide covers in more detail how to create a database. Here we give a short guide to creating a very simple database with OOo Base.
- Select File > New > Database to start the Database Wizard.
- Select Create a new database and click Next.
- On the next page, select Yes, register the database for me and Open the database for editing. Registering the database just means that it can be accessed from other OOo components such as Writer and Calc. You need to do this if you want to link your forms into it.
- Click Finish and save your new database, giving it a name. Unlike creating other documents in OOo, databases must be saved when you first create them.

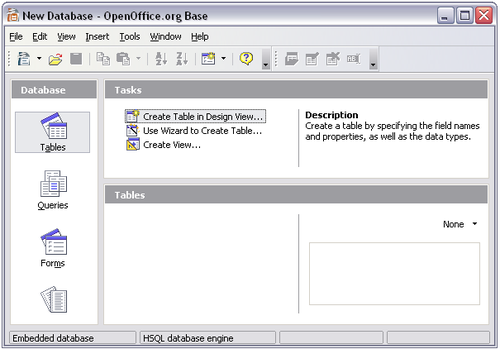
- After saving the database, you should see the main Base window, which contains three panels. The left-hand panel is Database, with icons for Tables, Queries, Forms and Reports.
 Main Base window.

The next step is to create a table. Again, this is covered in more detail in Chapter 8 (Getting Started with Base) in the Getting Started guide. Here we are going to create a small table as an example.
- Choose Tables in the left-hand column, then choose Create Table in Design View under Tasks.
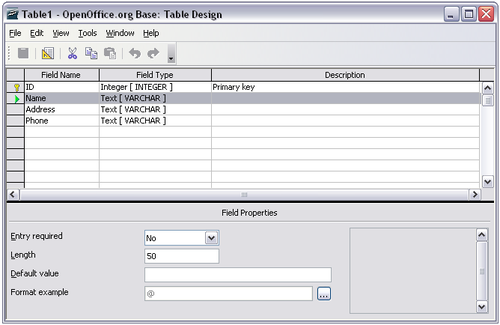
- Use the Table Design window to tell Base which fields to create. We will have just three fields: Name, Address, and Telephone.
- On the first line, enter under Field Name ID and set the Field Type to Integer [INTEGER]. In the gray box at the left of the line, right-click and select Primary Key, bringing up a key icon in the box. In the Field Properties at the bottom of the window is an Auto Value option; change this to Yes.
- On three lines, enter under Field Name Name, Address and Telephone. Accept the default Field Type of Text [VARCHAR] and leave Description blank.
- Save the table (File > Save). You will be prompted to name it (the name can be anything you like).
- Finally, save the whole database from the main Base window (File > Save).
 Database table design.


Accessing an existing data source
If you have an existing data source, such as a spreadsheet or database, you simply need to tell OpenOffice.org about it. This is called registering a data source.
To register an existing data source:
- Select File > New > Database to launch the Database Wizard.
- Select Connect to an existing database and choose the type from the drop-down list.
- Click Next and follow the instructions to select the database to register (the exact process varies between different types of data source).
- In Step 3: Save and proceed, check that Yes, register the database for me is selected. Deselect Open the database for editing – you just need to register it, not edit it through Base.

Creating a form for data entry
Whether you created a new database, or already had a data source, it must be registered with OpenOffice.org (see above). Once it is registered, linking your form to the data source is simple. Follow these steps to create a new form and link it to a registered data source.
- Create a new document in Writer (File > New > Text Document).
- Design your form, without putting in the actual fields (you can always change it later).
- Show the Form Controls toolbar (View > Toolbars > Form Controls).
- Click the Design Mode On/Off button
 to put the document into design mode, if necessary. With design mode off, most of the toolbar buttons are grayed out. If the Design Mode button is also grayed out, click on the Select button to activate it.
- Click the Text Box button
 . Click in the document and, holding down the left mouse button, drag the mouse to create a text box for the first form field (for example, Name, if you are linking to the database created above).
- Click the Text Box button again and drag the mouse to draw another field. Additional fields, of any type, can be added in the same way (click and drag).
So far you have followed the same steps you used before when you created your first form. Now you link your form with the data source you registered.
- Launch the Form Properties dialog box. You can do this by clicking on the Form button
 in the Form Controls toolbar or by right-clicking on any of the fields you inserted and selecting Form. The form button is grayed out unless you have one of the form elements selected. As soon as you select a form element in your document, the Form button becomes clickable.
 - In the Form Properties dialog box, click on the Data tab.
- Set Data Source to be the data source you registered.
- Set Content Type to be Table.
- Set Content to be the name of the table you want to access.
- Close the dialog box.
- For each form control in turn, launch the Properties dialog box. Click on the control to select it (so small green boxes appear around it). Then either right-click and select Control or click on the Control button
 on the Form Controls toolbar.
 - In the Properties dialog box, click on the Data tab. If you set up the form correctly, the Data Field option will contain a list of the different fields in the data source (for example, Name, Address and Telephone). Select the field you want.
- Repeat for each control in turn until every control that should be has been assigned to a field.


Entering data into a form
Once you have created a form and tied it to a database, you want to use it to enter data into your data source, or modify data already there.
- Make sure that the form is not in design mode. In the Form Controls toolbar, click on the Design Mode On/Off button
 . If design mode is off, most of the buttons on the toolbar will be grayed out.
 - Make sure that the Form Navigation toolbar is on (View > Toolbars > Form Navigation). This toolbar normally appears at the bottom of the window.
- If there is existing data in the data source, use the control buttons on the Form Navigation toolbar to look at different records. You can amend data in a record by editing the values in the form. To submit the changes, press the Enter key with the cursor in the last field. The record is saved and the next record is displayed.
- If there is no data in the form, you can enter it. To submit the new record, press the Enter key with the cursor in the last field.
- Other functions can be performed from the Form Navigation toolbar, including deleting a record and adding a new record.
| Content on this page is licensed under the Creative Common Attribution 3.0 license (CC-BY). |