Creating named ranges
From Apache OpenOffice Wiki
This section provides different ways to create named ranges in spreadsheets.
To define a name for a cell range, do the following steps:
- Select the cell range and click to open the Define Names window.
- Enter the name for the range in the Name field.
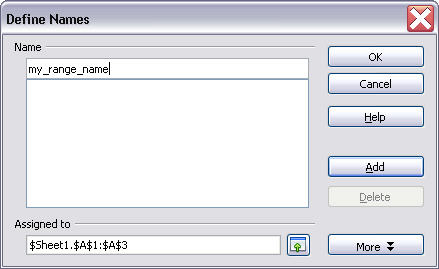
- Click OK to close the window.

To automatically define names for rows or columns in a
cell range, do the following steps:
- Select the cell range and click to
open the Create Names window.
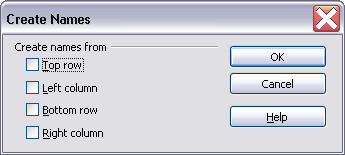
- Select the options in the Create names from field. For example, if you select the Top row option, each column without the top row is defined as a range, and the text in the top row is used as the name of this range automatically.
- Click OK to close the window.

To define a cell reference for a label range, do the following
steps:
- Click to open the Define
Label Range window.
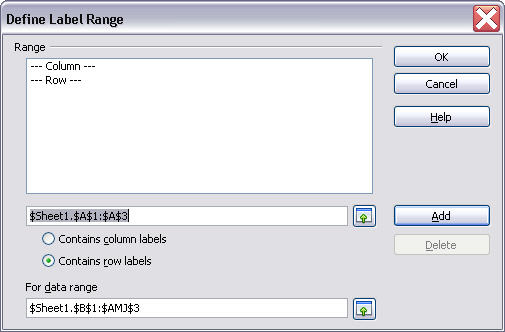
- Click the editing area in the Range field, and then select a cell range as the reference. The label range is set by default. For example, if you select a certain row in your spreadsheet, all the columns under this row are defined as a label range by default.
- To change the label range, click the For data range field and select a new label range.
- Click OK to close the window.
