Formatting a presentation
Now put your presentation together based on your outline.
Creating the first slide
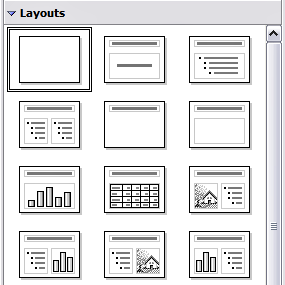
The first slide is normally a title slide. Decide which of the layouts will best suit your purposes for this first slide: simplicity would be appropriate in this instance. You can use the pre-packaged layouts available in the Layout section of the task pane. Suitable layouts are Title Slide (which also contains a section for a subtitle) or Title Only, however all but one layout (the blank one) contains a title section, so you are not restricted to the two layouts described here.
To create the title, click on "Click to add title" (assuming the Blank Slide layout was not used) and then type the title text. Adjustments to the formatting of the title can be done by pressing the F11 key, right-clicking the Title presentation style entry, and selecting Modify from the pop-up menu.
If you are using the Title Slide layout, click on Click to add text to add a subtitle. Proceed as above to make adjustments to the formatting if required.
Inserting additional slides
The steps for inserting additional slides are basically the same as for selecting the title page. It is a process that has to be repeated for each slide. Unless you are using more than one slide master, your only concern is the Layouts section of the Tasks pane.
First insert all the slides your outline indicates you will need. Only after this should you begin adding special effects such as custom animation and slide transitions.
Step 1: Insert a new slide. This can be done in a variety of ways—take your pick.
- Insert > Slide.
- Right-click on the present slide, and select New Slide from the pop-up menu.
- Click the Slide icon in the Presentation toolbar.
Step 2: Select the layout slide that bests fits your needs.
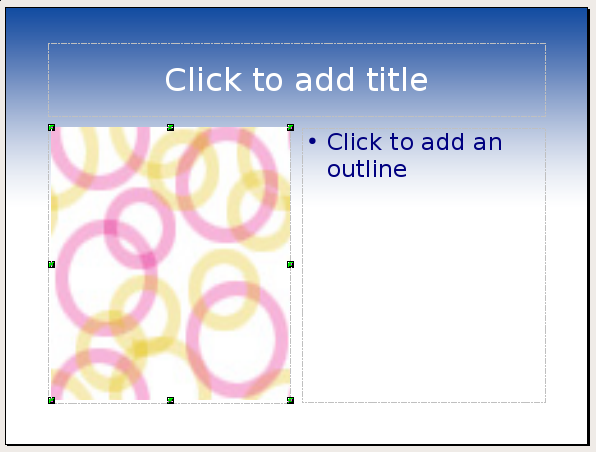
Step 3: Modify the elements of the slide. At this stage, the slide consists of everything contained in the slide master, as well as the chosen layout slide, so this includes removing unneeded elements, adding needed elements (such as pictures), and inserting text.
- Remove any element on the slide that is not required.
- Click the element to highlight it. (The green squares show it is highlighted.)
- Press the Delete key to remove it.
- Add any elements to the slide that you do need.
- Adding pictures to the clipart frame, if your chosen layout includes one:
- Double-click the picture within the frame.
- Browse to the location of the picture you want to include.
- Select the picture and click Open.
- Resize the picture as necessary. Follow the directions in the Caution note below.
- Adding pictures from graphic files to places other than the clipart frame:
- Insert > Picture > From File.
- Browse to the graphic file, select it, and click Open.
- Move the picture to its location.
- Resize the picture, if necessary.
- Adding OLE Objects is an advanced technique covered in Chapter 7 (Inserting spreadsheets, charts, and objects).
- Adding text to a slide: If the slide contains text, click on "Click to add an outline" in the text frame and then type your text. The Outline styles from 1 to 10 are automatically applied to the text as you insert it. You can change the outline level of each paragraph as well as its position within the text using the arrow buttons on the Text Formatting toolbar (see the section Outline view).

Deleting an element of a slide.
Step 4: To create additional slides, repeat steps 1-3.
Modifying the appearance of slides
To change the background and other characteristics of all slides in the presentation, you need to modify the slide master or choose a different slide master.
A Slide Master is a slide with a specified set of characteristics which is used as the beginning point for creating other slides. These characteristics include the background, objects in the background, formatting of any text used, and any background graphics.
Impress has five pre-packaged slide masters, found in the Master Pages section of the Task pane (Figure 3). You can also create and save additional slide masters. See Chapter 2 for information on creating and modifying slide masters.
Modifying the slide show
Now review the entire presentation and answer some questions. Run the slide show at least once before answering them. You might want to add some questions of your own.
- Are the slides in the correct order? If not, some of them will need to be moved.
- Would an additional slide make a particular point clearer? If so, another slide needs to be created.
- Would some custom animations help some of the slides? (Advanced technique.)
- Should some of the slides have a different slide transition than others? The transition of those slides should be changed.
- Do some of the slides seem unnecessary? Delete the affected slide or slides after checking if they are indeed unnecessary.
Once you have answered these and your own questions, you should make the necessary changes. This is done most easily in the Slide Sorter view. If you need one or more new slides, create them using the steps listed in Inserting additional slides.
Renaming slides
Right-click on a thumbnail in the Slides pane or the Slide Sorter and choose Rename Slide from the pop-up menu. In the Name field, delete the old name of the slide and type the new name. Click OK to save the change.
Custom animations
If you know how to add a custom animation to a slide and wish to do so, do it now. Custom animations are found on the Tasks pane. This is an advanced technique and is explained in Chapter 9 (Slide shows).
Slide transitions
Your first slide show should probably have the same slide transition for all slides. Setting Advance slide to On mouse click is the default and a simple setting. If you want each slide to be shown for a specific amount of time, click Automatically after and enter the number of seconds. Click Apply to all slides.
Transition choices are found on the Tasks pane. For more information about slide transitions, see Chapter 9 (Slide Shows).
| Content on this page is licensed under the Creative Common Attribution 3.0 license (CC-BY). |
