Difference between revisions of "Documentation/OOoAuthors User Manual/Getting Started/Creating a Fontwork object"
From Apache OpenOffice Wiki
(→Creating a Fontwork object) |
|||
| Line 1: | Line 1: | ||
| + | {{DISPLAYTITLE:Creating a Fontwork object}} | ||
{{Documentation/GSFontworkTOC | {{Documentation/GSFontworkTOC | ||
|ShowPrevNext=block | |ShowPrevNext=block | ||
|PrevPage=Documentation/OOoAuthors User Manual/Getting Started/Using Fontwork | |PrevPage=Documentation/OOoAuthors User Manual/Getting Started/Using Fontwork | ||
|NextPage=Documentation/OOoAuthors User Manual/Getting Started/Editing a Fontwork object | |NextPage=Documentation/OOoAuthors User Manual/Getting Started/Editing a Fontwork object | ||
| − | }} | + | }}__NOTOC__ |
| − | __NOTOC__ | + | |
| − | + | ||
<ol> | <ol> | ||
<li>On the Drawing or Fontwork toolbar, click the Fontwork Gallery icon: [[Image:FontworkGalleryIcon.jpg]]. If the Drawing toolbar is not visible, go to '''View > Toolbars > Drawing''' to display it.</li> | <li>On the Drawing or Fontwork toolbar, click the Fontwork Gallery icon: [[Image:FontworkGalleryIcon.jpg]]. If the Drawing toolbar is not visible, go to '''View > Toolbars > Drawing''' to display it.</li> | ||
| − | <li>In the Fontwork Gallery dialog (Figure 3), select a Fontwork style, then click '''OK'''. The Fontwork object will appear in your document. Notice the blue squares around the edge (indicating that the object is selected) and the yellow dot; these are discussed in [[ | + | <li>In the Fontwork Gallery dialog (Figure 3), select a Fontwork style, then click '''OK'''. The Fontwork object will appear in your document. Notice the blue squares around the edge (indicating that the object is selected) and the yellow dot; these are discussed in [[Documentation/OOoAuthors User Manual/Getting Started/Moving and resizing Fontwork objects|Moving and resizing Fontwork objects]].</li> |
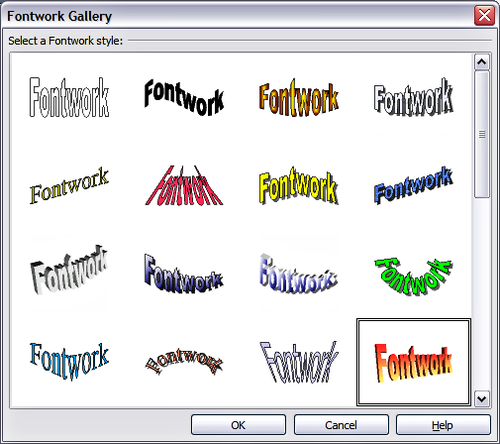
[[Image:FontworkGallery.png|thumb|none|500px|Figure 3: The Fontwork Gallery.]] | [[Image:FontworkGallery.png|thumb|none|500px|Figure 3: The Fontwork Gallery.]] | ||
<li>Double-click the object to edit the Fontwork text. Type your own text in place of the black ''Fontwork'' text that appears over the object (Figure 4). | <li>Double-click the object to edit the Fontwork text. Type your own text in place of the black ''Fontwork'' text that appears over the object (Figure 4). | ||
Latest revision as of 08:07, 13 April 2008
- On the Drawing or Fontwork toolbar, click the Fontwork Gallery icon:
 . If the Drawing toolbar is not visible, go to View > Toolbars > Drawing to display it.
 - In the Fontwork Gallery dialog (Figure 3), select a Fontwork style, then click OK. The Fontwork object will appear in your document. Notice the blue squares around the edge (indicating that the object is selected) and the yellow dot; these are discussed in Moving and resizing Fontwork objects.
- Double-click the object to edit the Fontwork text. Type your own text in place of the black Fontwork text that appears over the object (Figure 4).
- Click anywhere in a free space or press Esc to apply your changes.
| Content on this page is licensed under the Creative Common Attribution 3.0 license (CC-BY). |

